Field Manager
Crop Rotation
The crop rotation calendar is an essential tool for sustainable farming and food security. With this tool, you can plan new sowings by analyzing historical sowings in a single place.
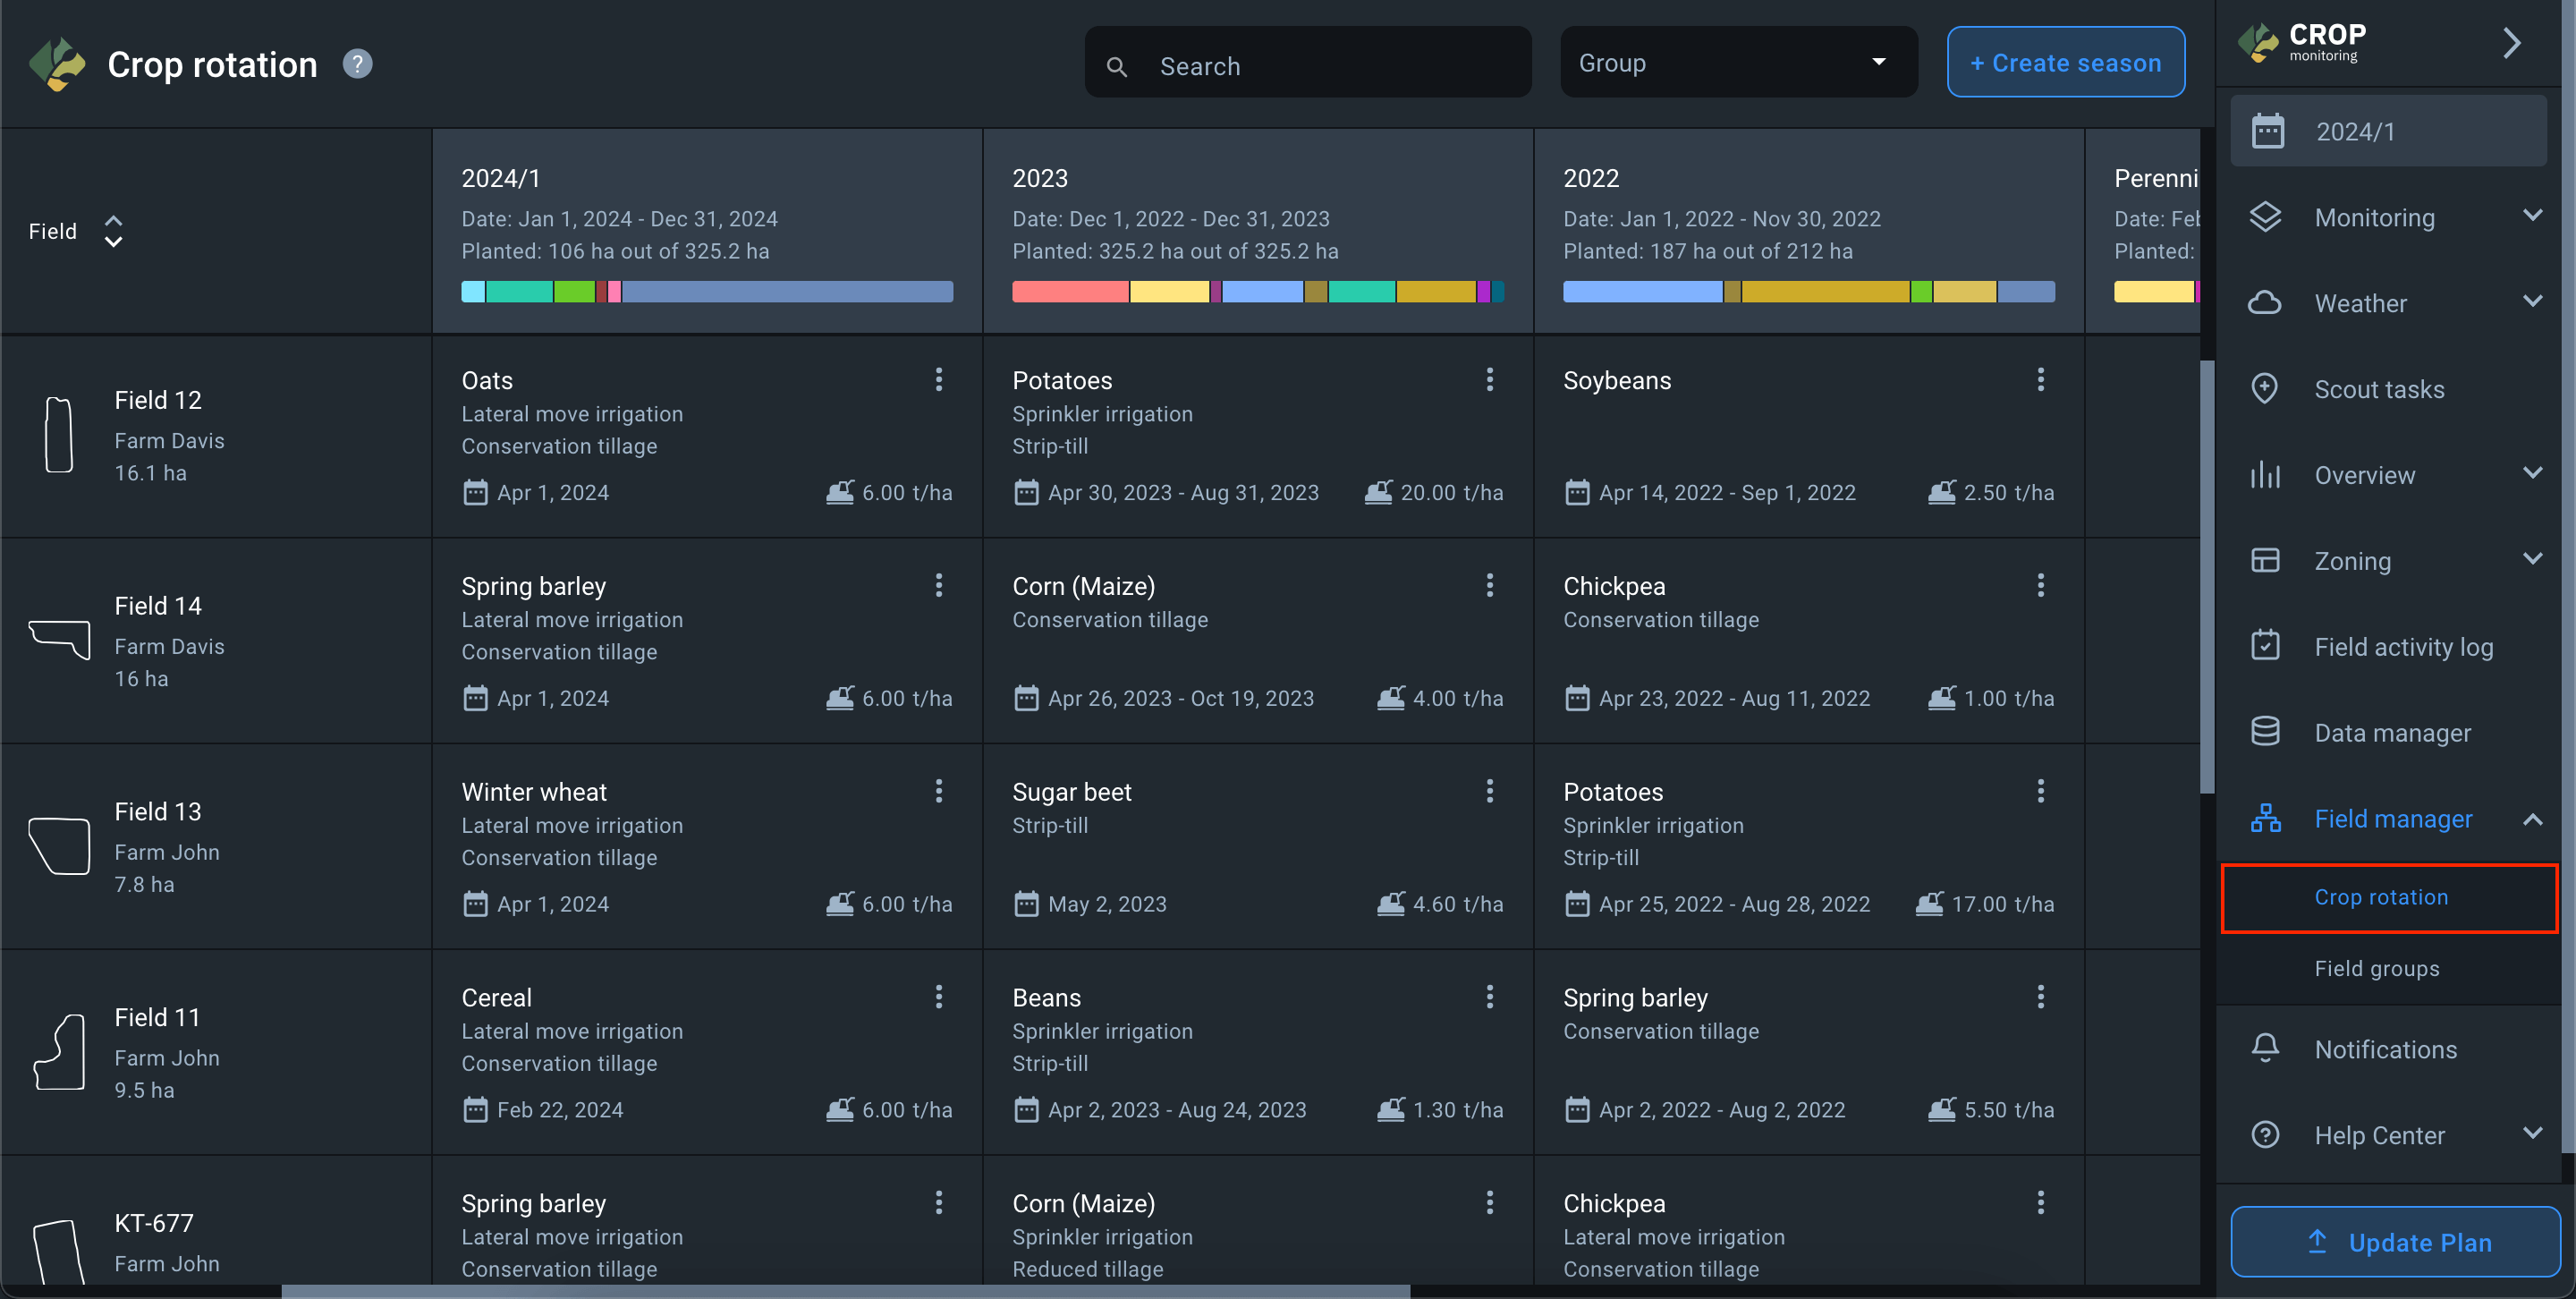
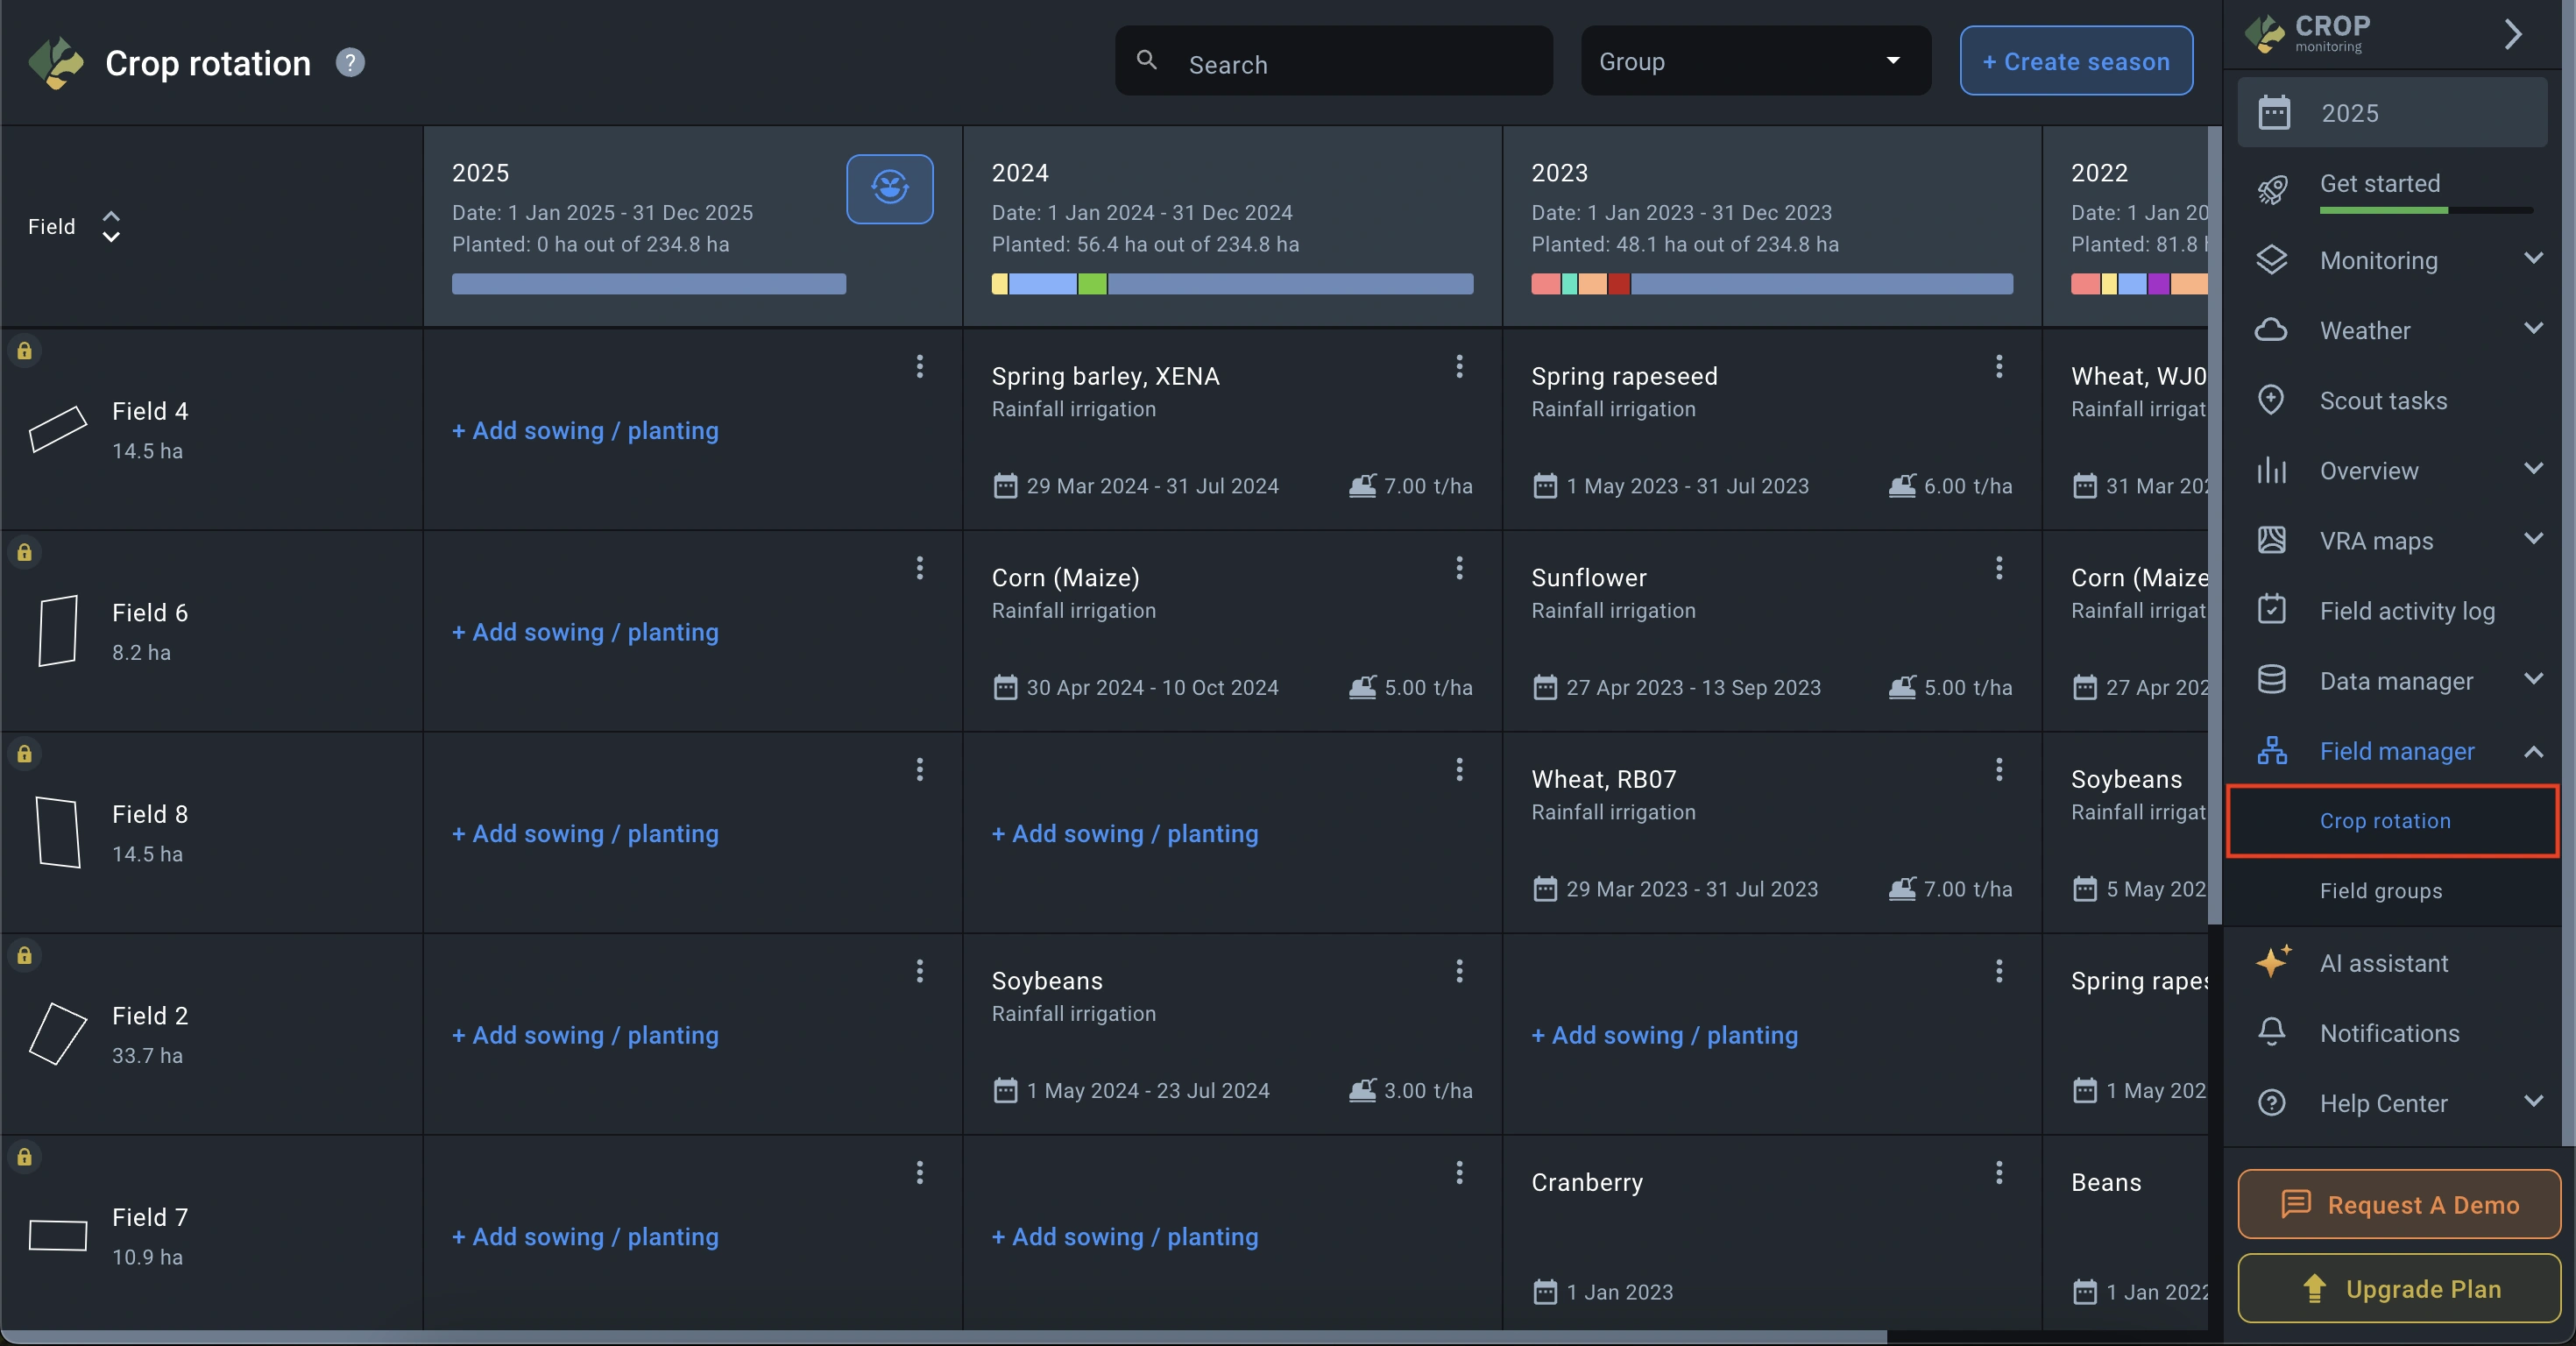
When you navigate to the “Crop rotation” section, the list on the left displays all fields in your account. At the top of the crop rotation calendar, you’ll find:
- names of your seasons
- duration of each season
- proportion of hectares for each crop in the season.
There are three field statuses on the crop rotation calendar for the season:
1) Field not available in the season.
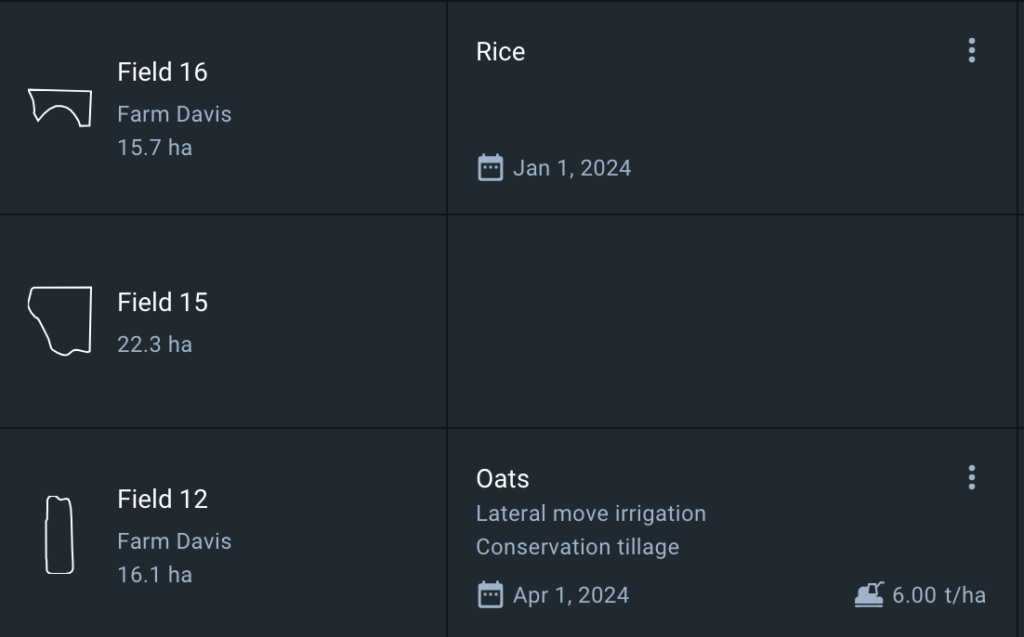
2) Field is available in the season, but data on sowing has not been added.
3) Field is available in the season and sowing has been added for it.
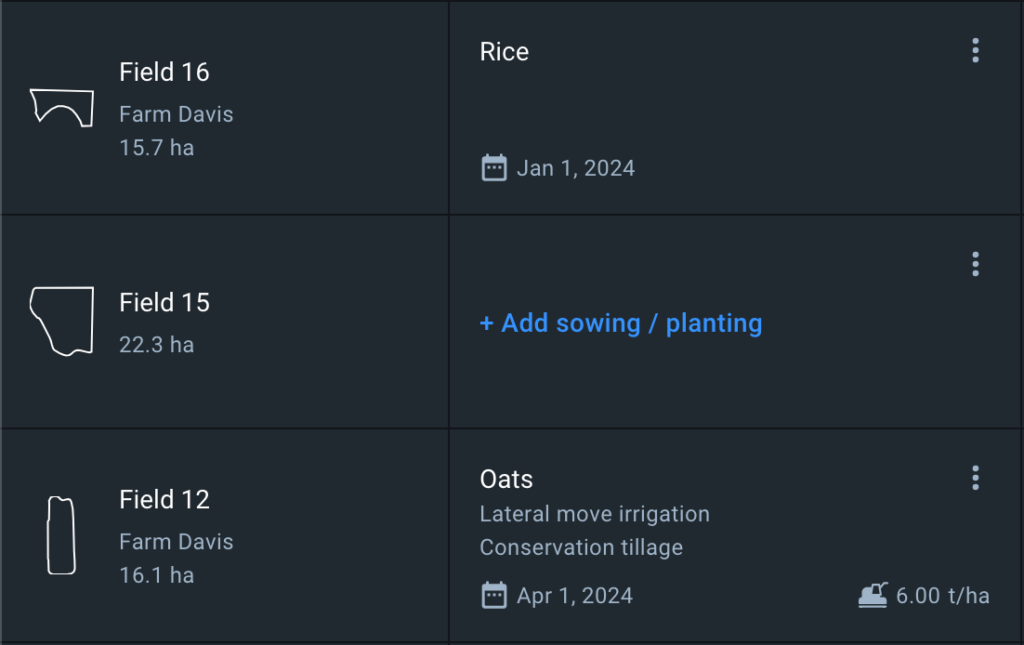
Manage sowing
1) To add a field to a season, hover above an empty cell in the desired season and click + Add to season.

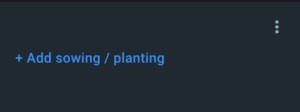
2) To add data on sowing to a field, click on the cell with the text + Add sowing/planting in the desired season.
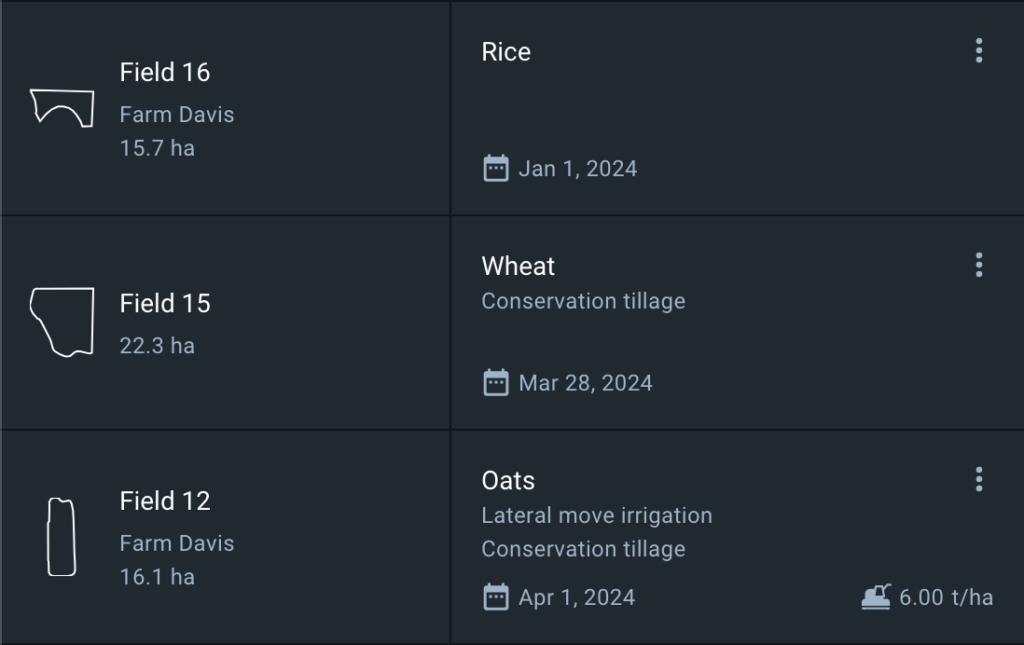
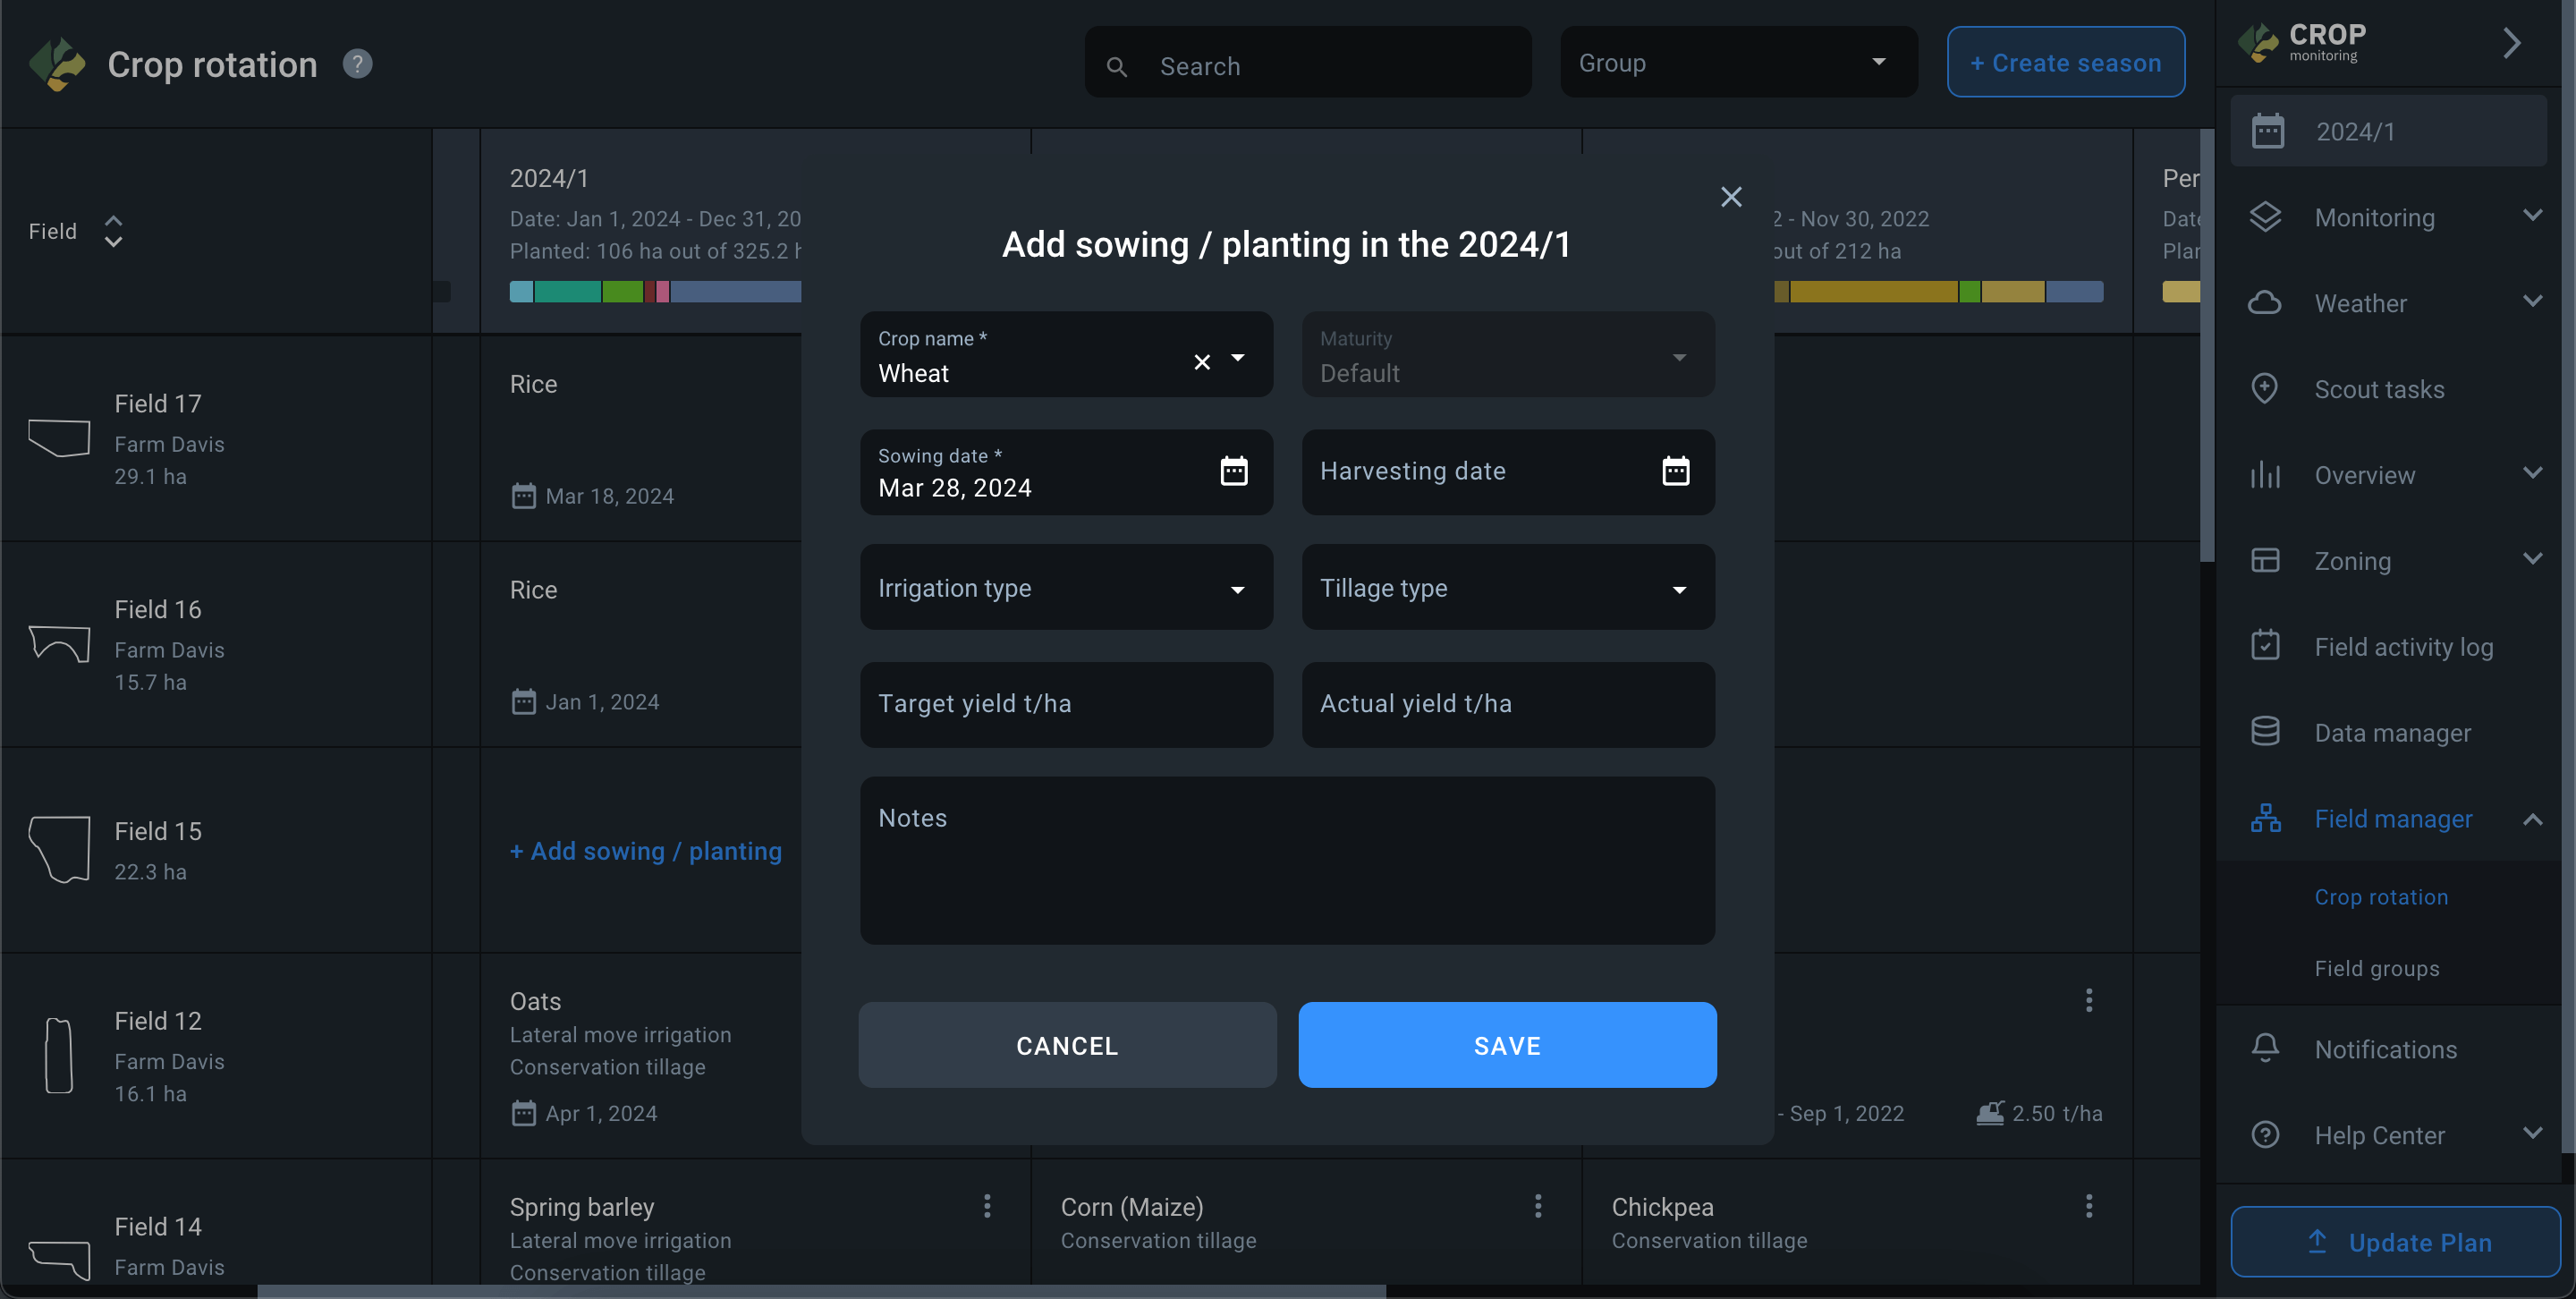
3) In the Add sowing/planting window that opens, you must enter the sowing parameters and save them.
4) Once saved, the sowing parameters for the desired season will be displayed in the field cell.
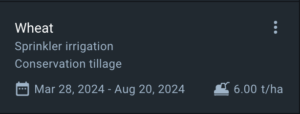
5) Only the parameters you specified are displayed in the sowing cell:
- Crop name
- Irrigation type
- Tillage type
- Sowing date – Harvesting date
- Yield t/ha
* The actual yield set by you is displayed in the sowing cell. If there is no actual yield, the target yield is displayed.
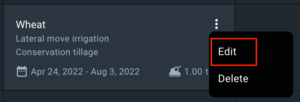
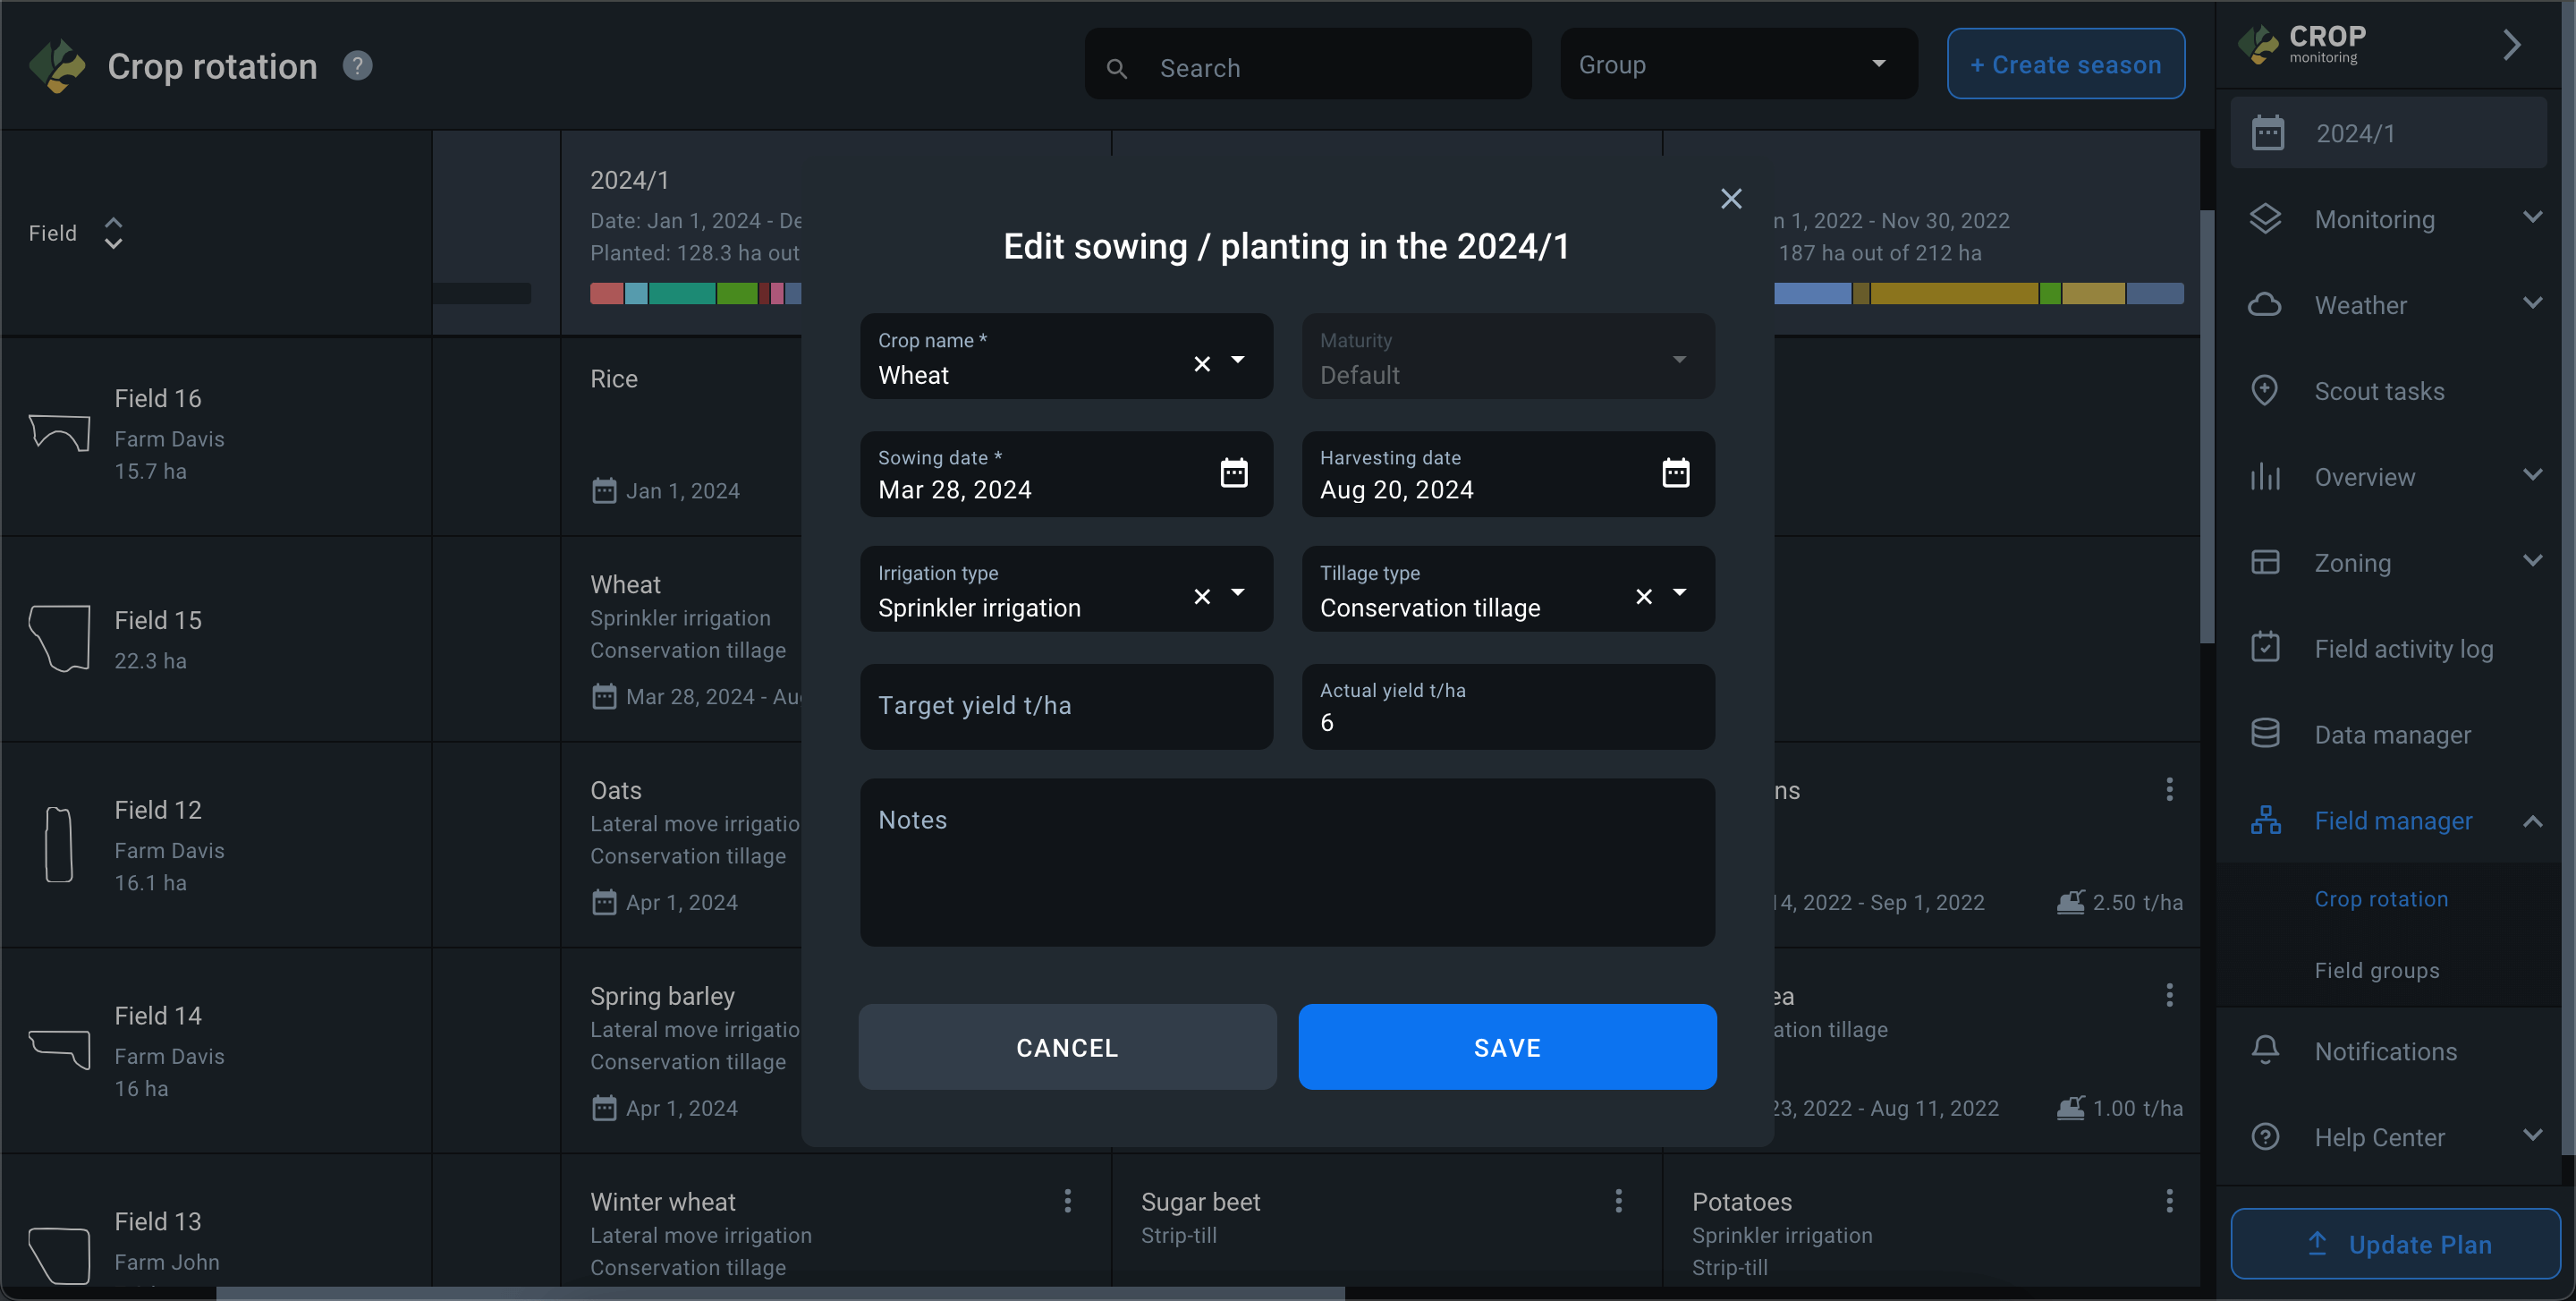
It is also possible to edit sowing parameters or remove fields from the season.
- To edit sowing parameters, open the more menu (three vertical dots) in the sowing cell and select the Edit action.
- A window of sowing editing will open where you can change any parameter and save the changes.
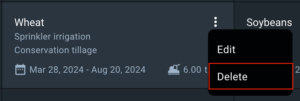
- To delete a field from a season, open the more menu (three vertical dots) in the seeding cell and select the Delete action. The field will only be deleted from the season but will remain in the account.
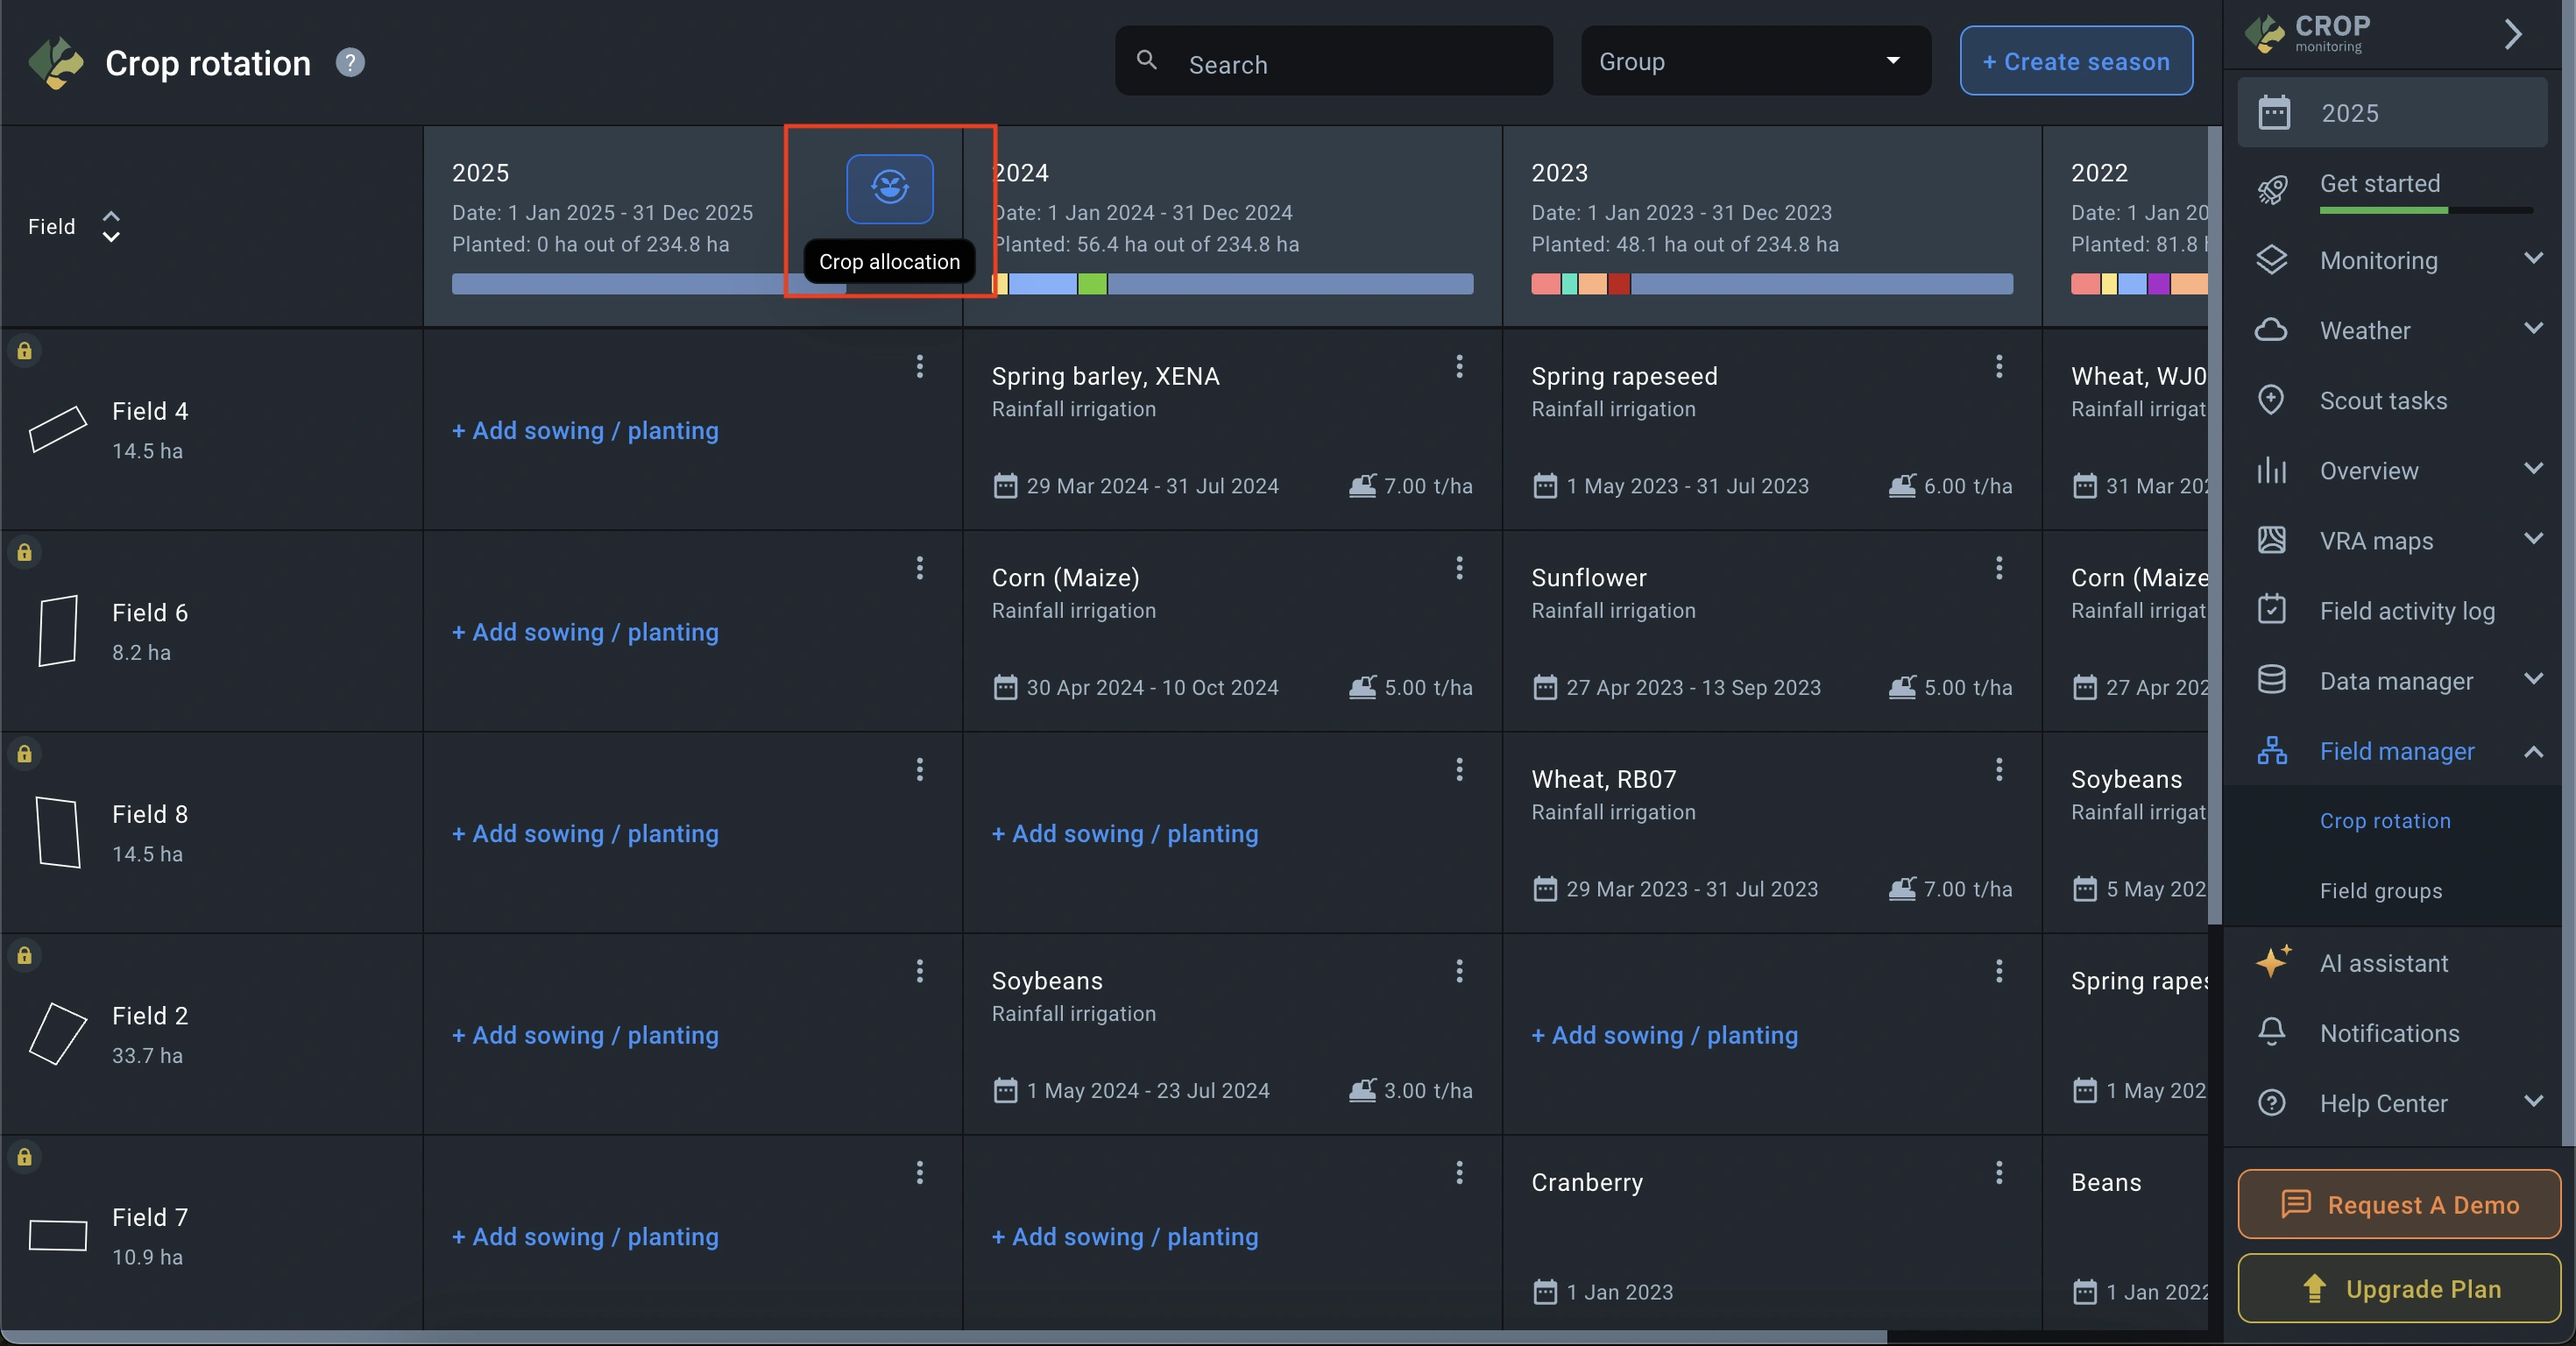
Crop allocation
The Crop Allocation feature is located in the Crop Rotation section, within the season table.
This feature helps automatically distribute the selected crops across fields in the chosen season. Allocation is available for active and planned seasons and includes only fields without sown crops.
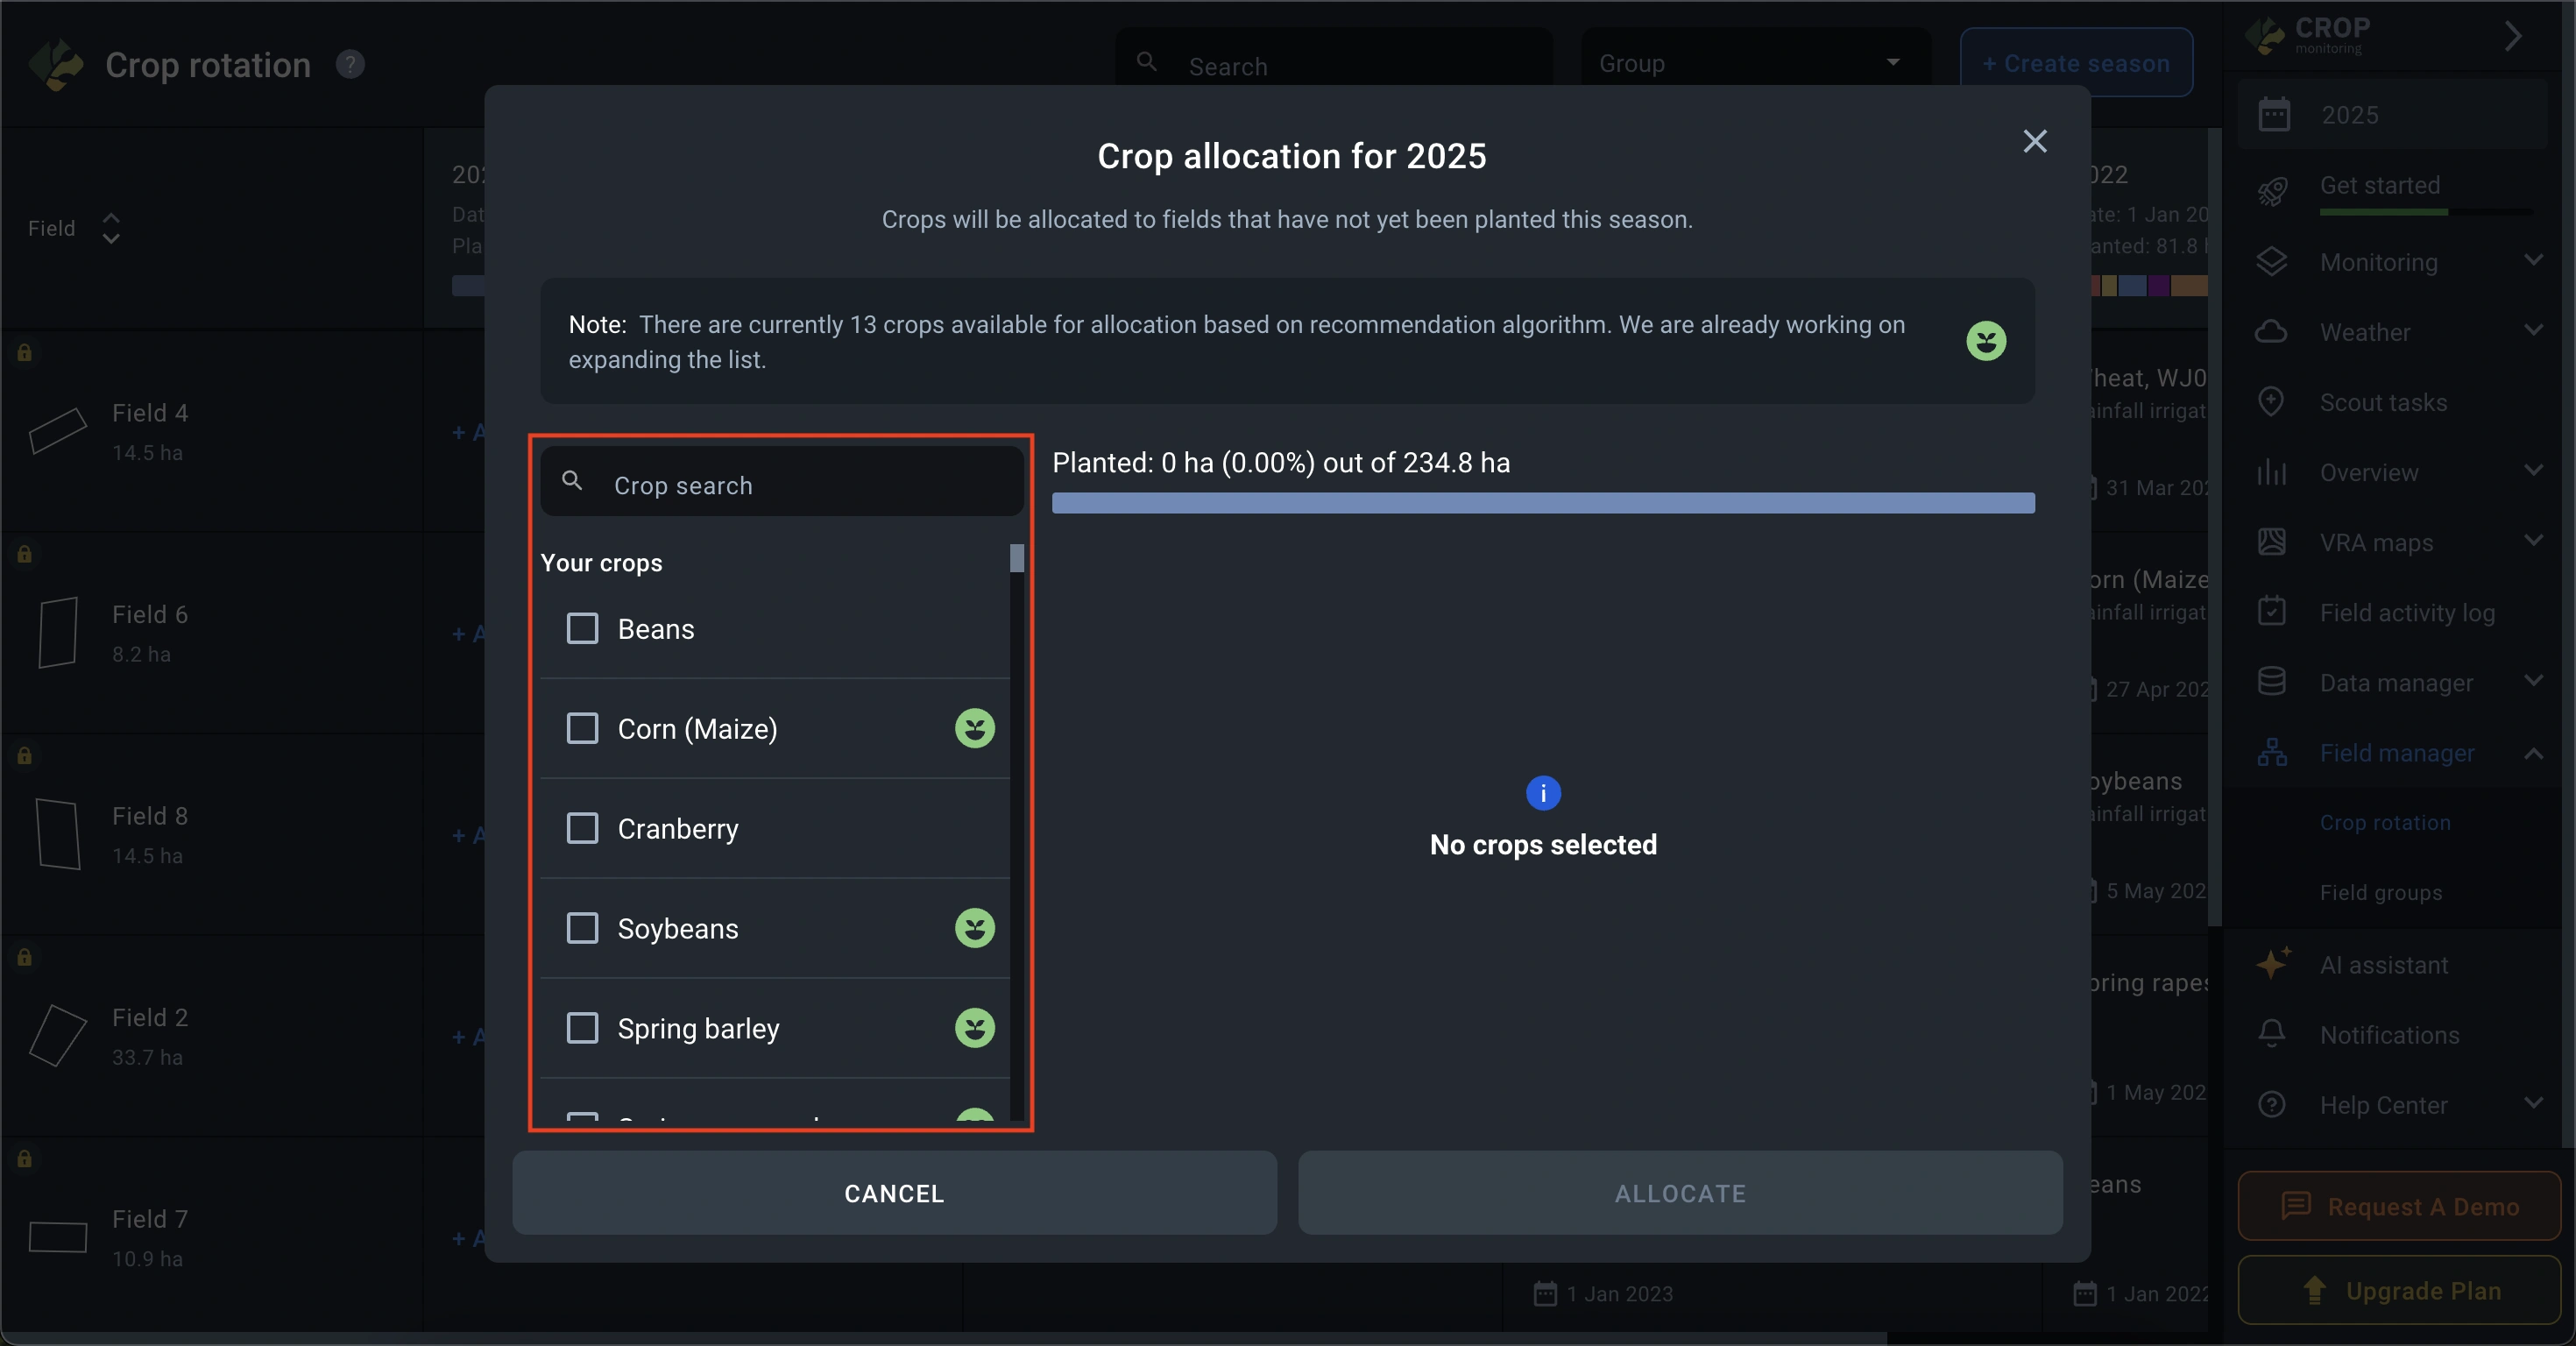
To use the Crop Allocation feature, go to the Crop Rotation section, select a season where the feature is available, and click the Crop Allocation button.
In the pop-up window, select the crops you want to allocate. Then, enter the area to allocate for each crop and specify a sowing date. (Sowing date is optional at this step, but the system will require it later if not provided now.)
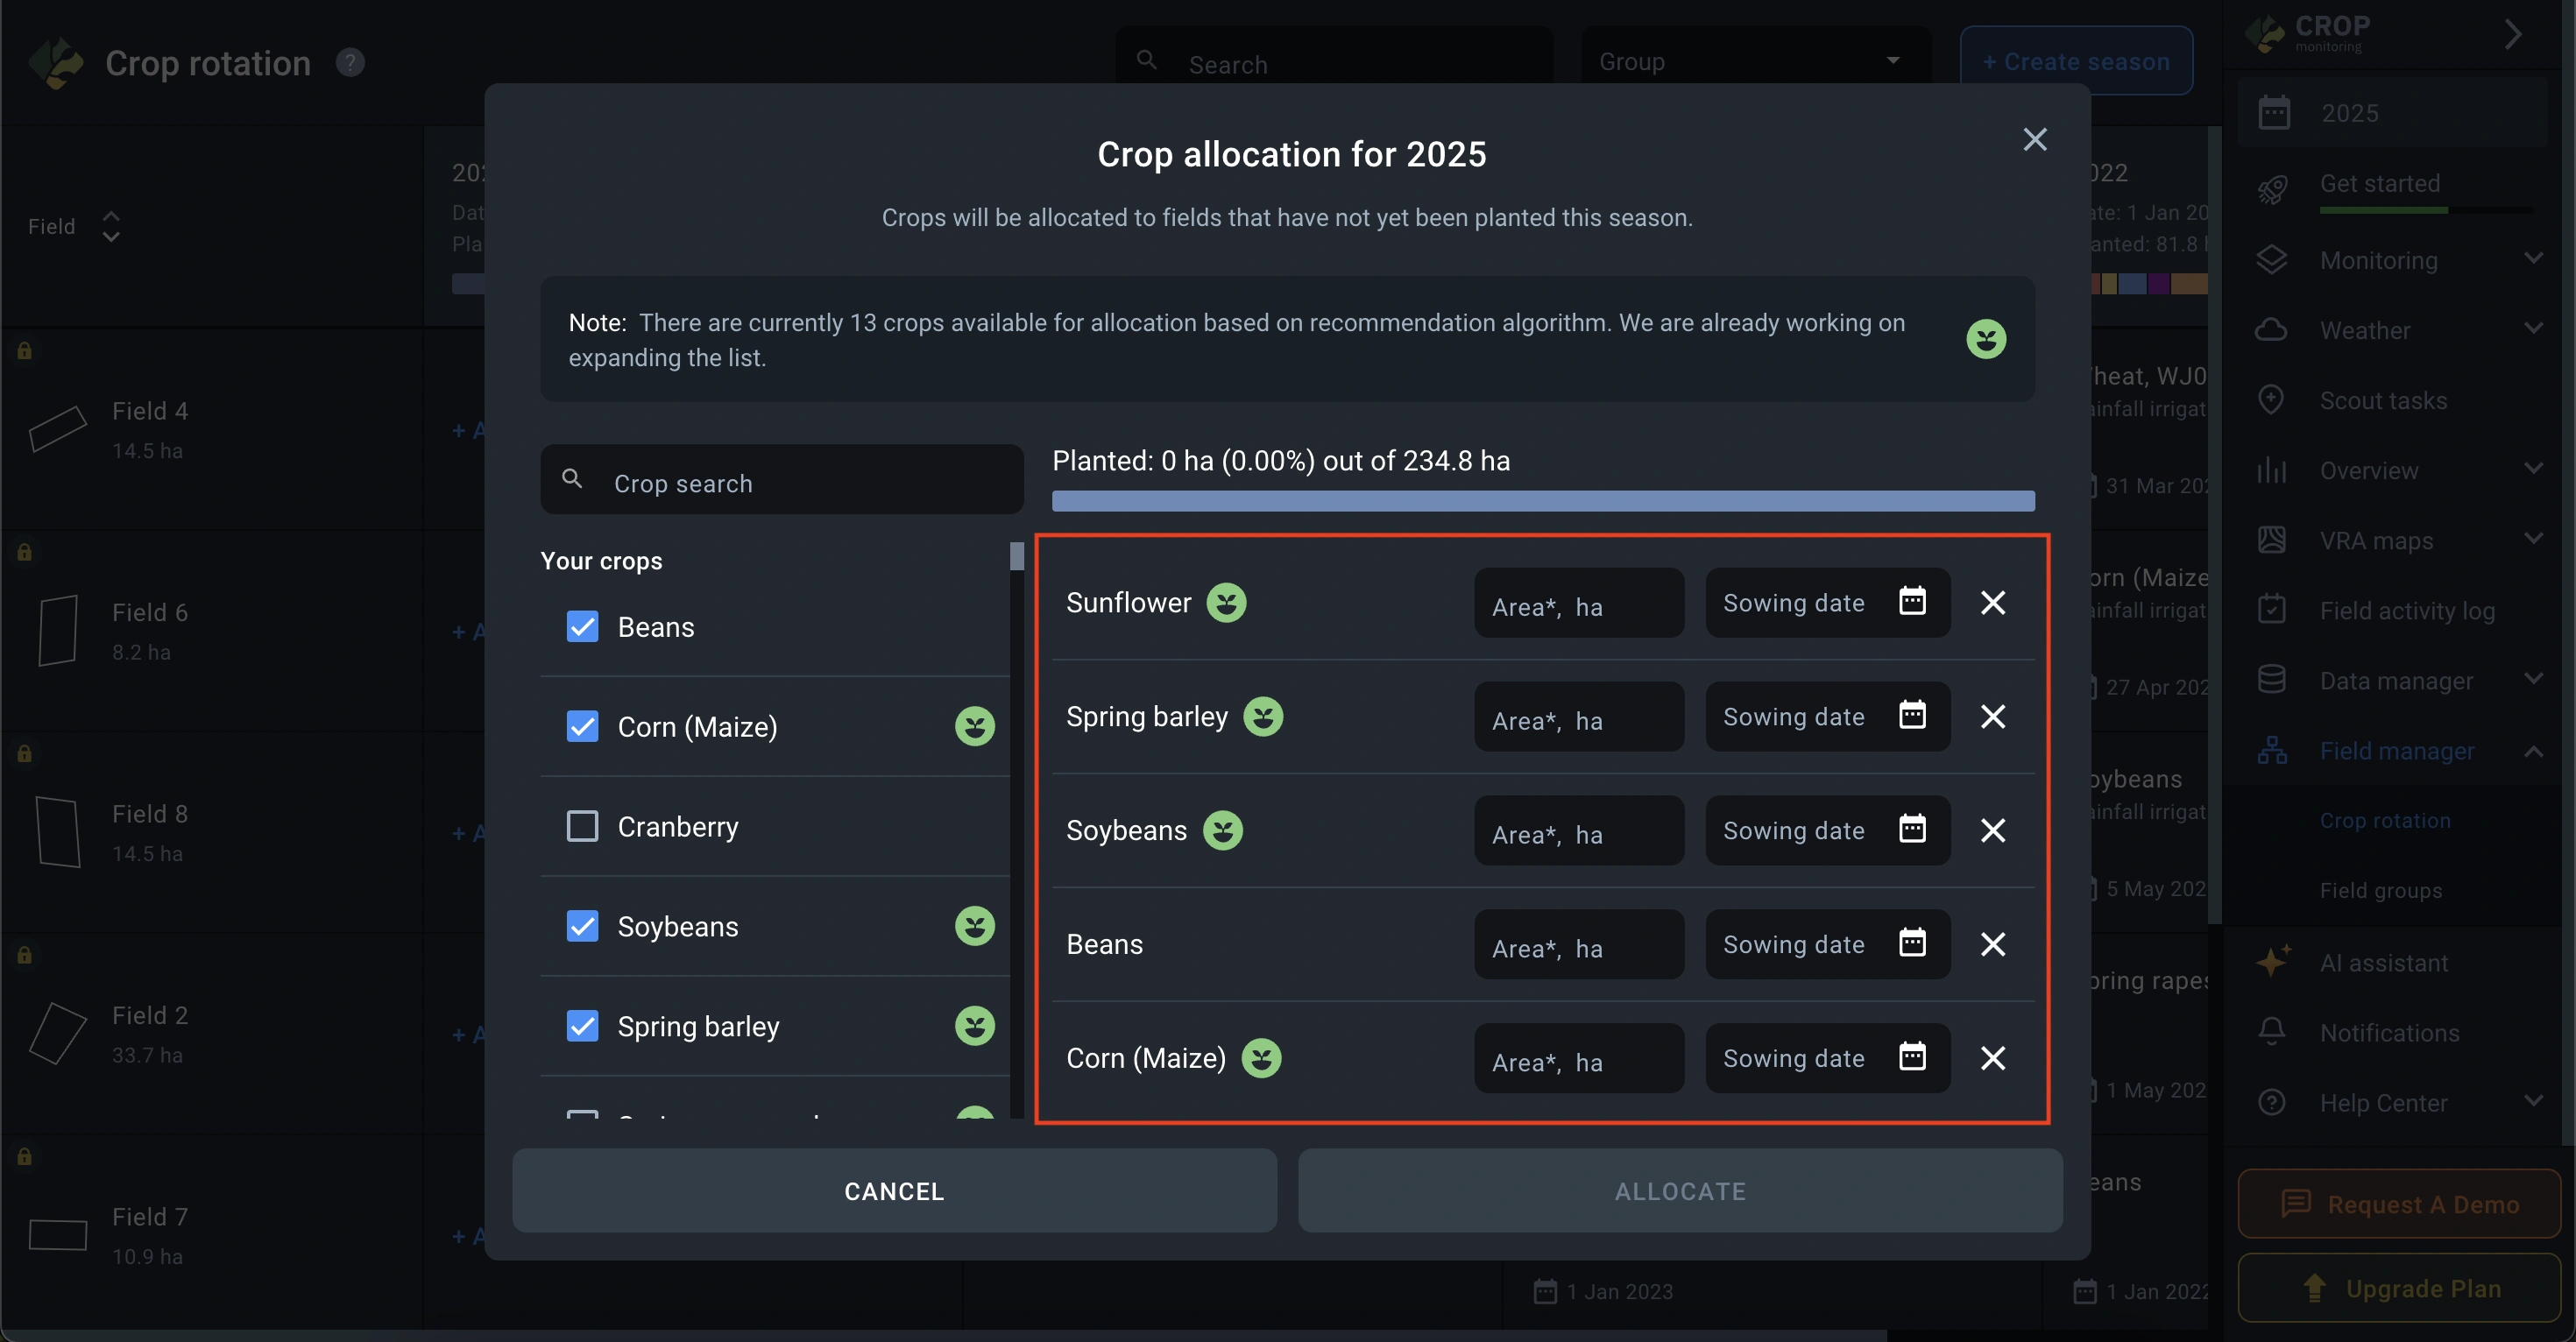
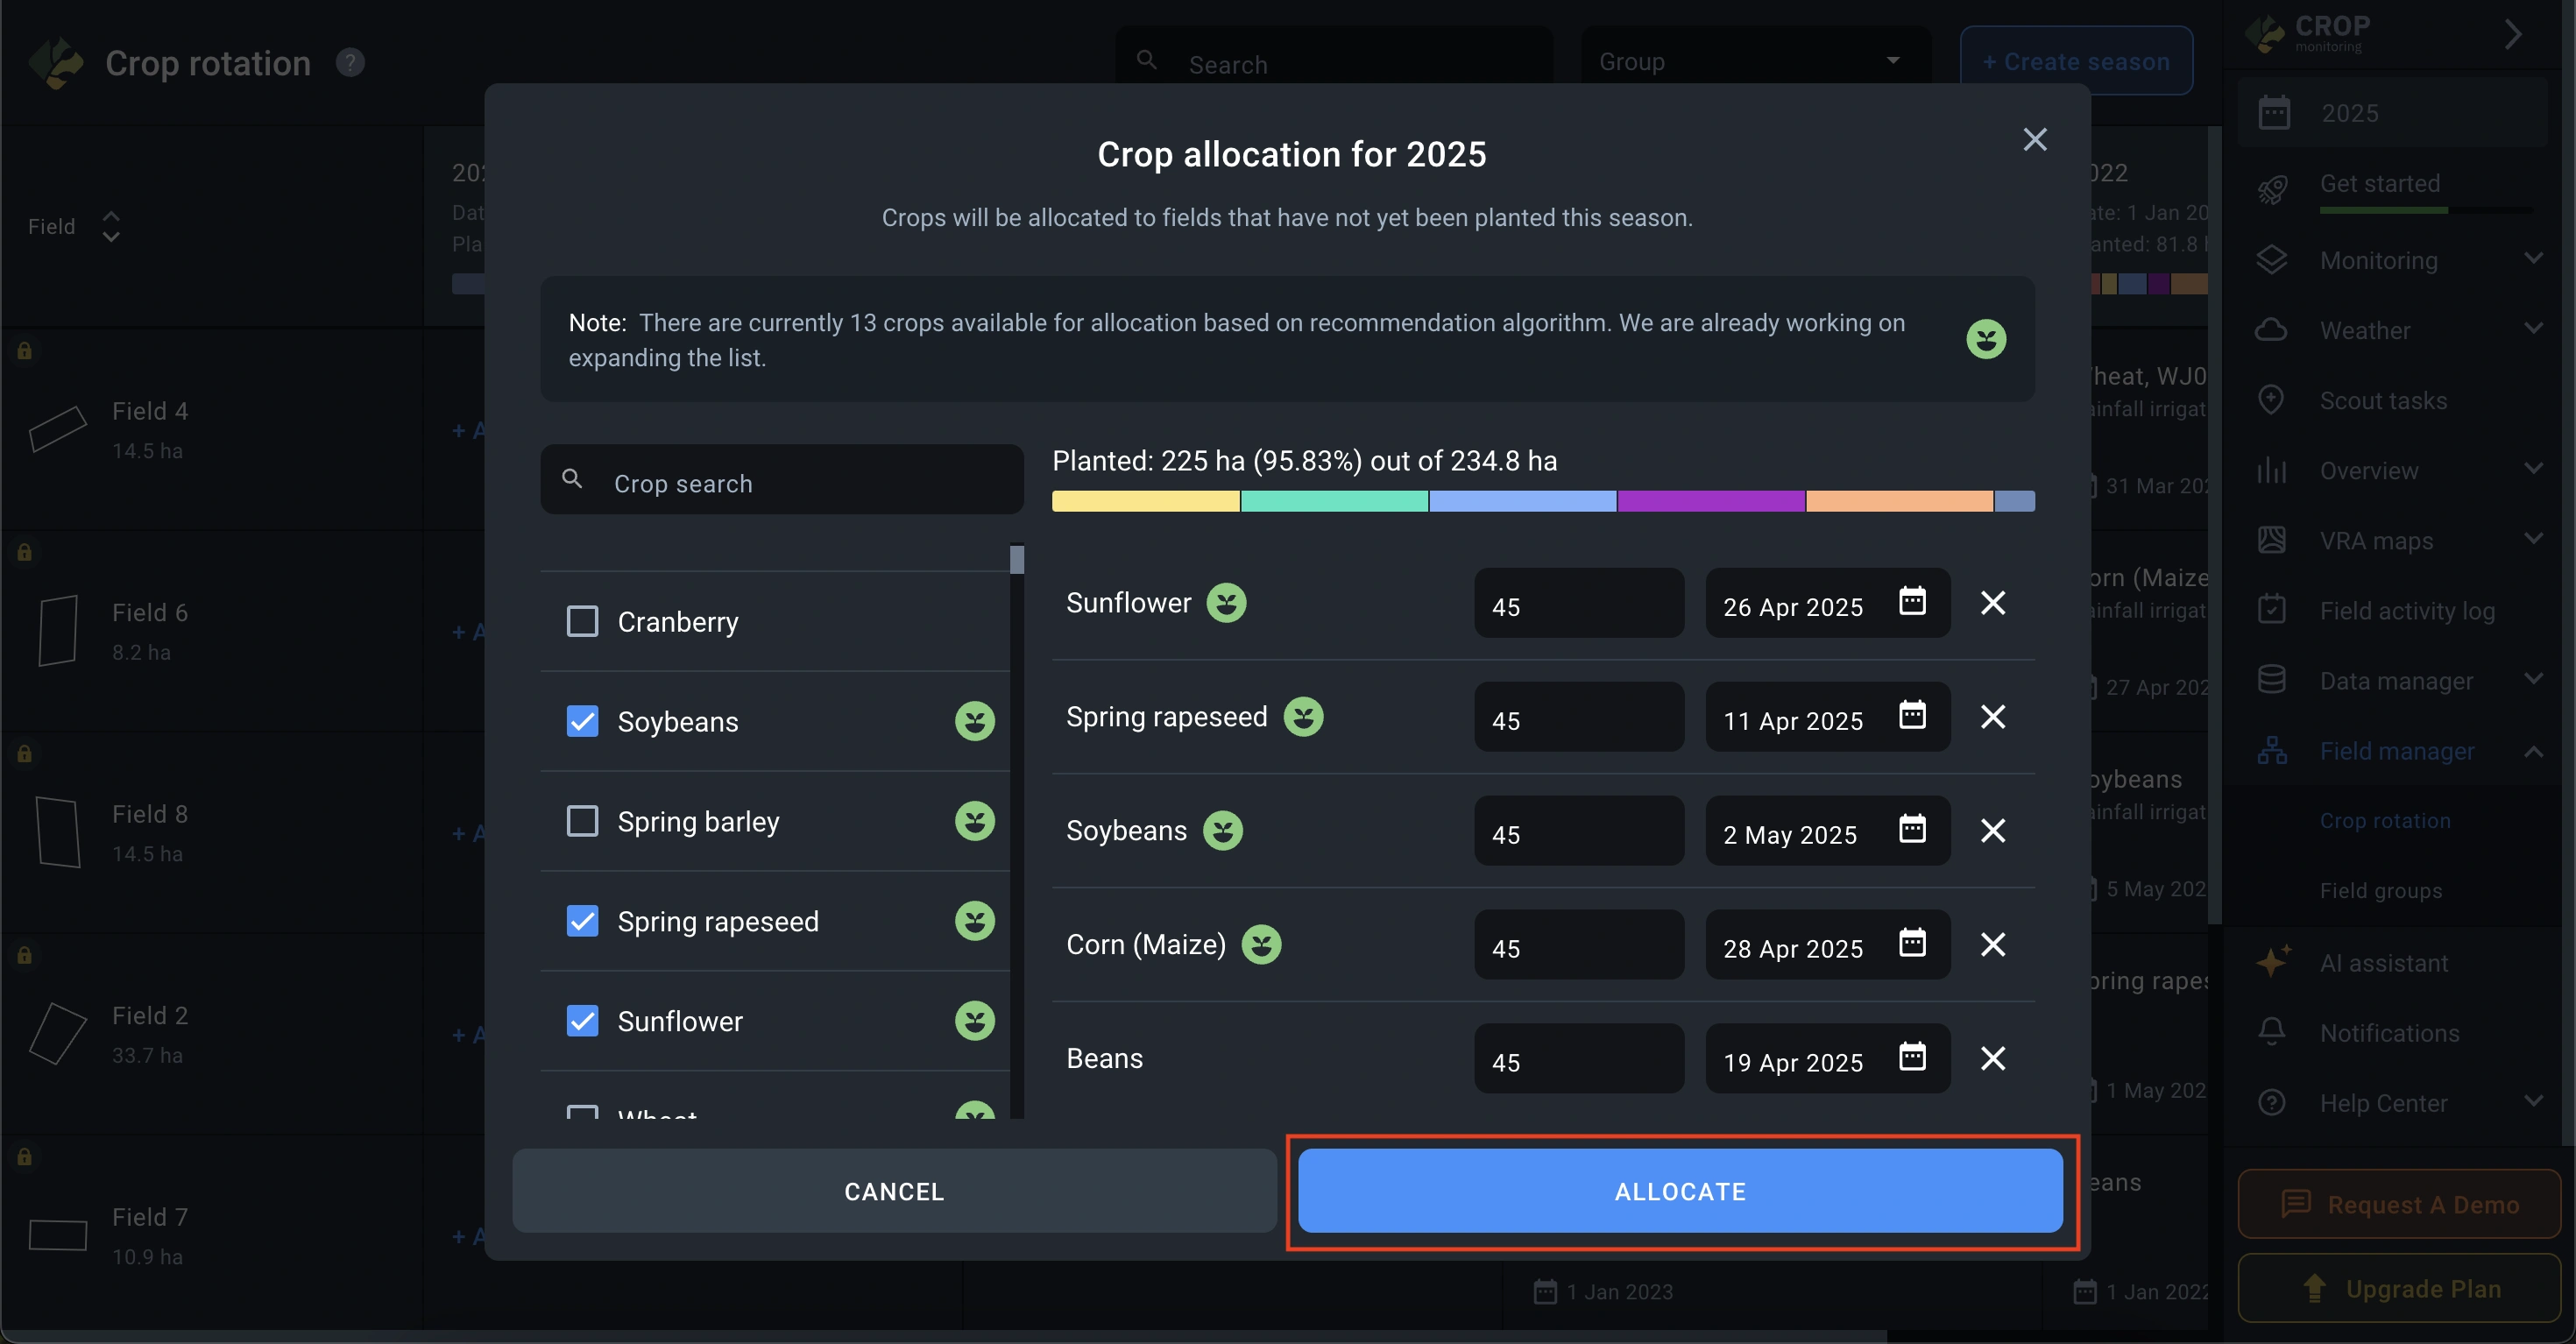
⚠️ Note: the total area of all selected crops must not exceed the available area in the season.
Once all parameters are set, click Allocate to start the allocation process.
When the system finishes, you will see a list of fields involved and the crops assigned to each.

Each crop can have one of four statuses:
- Green indicator — crop is allocated based on the rotation matrix, and the field has 3 or more consecutive seasons with supported crops in its history.

- Yellow indicator — crop is allocated based on the matrix, with 1 or 2 seasons of supported crops in the field history.

- Gray indicator — the crop is supported by the matrix, but no matching crops were found in the field’s history. Allocation is based only on the specified area.

- No indicator — the crop is not currently supported by the rotation matrix and is allocated based only on the input area.

In this window, you can also set or adjust the sowing dates and exclude fields before saving.
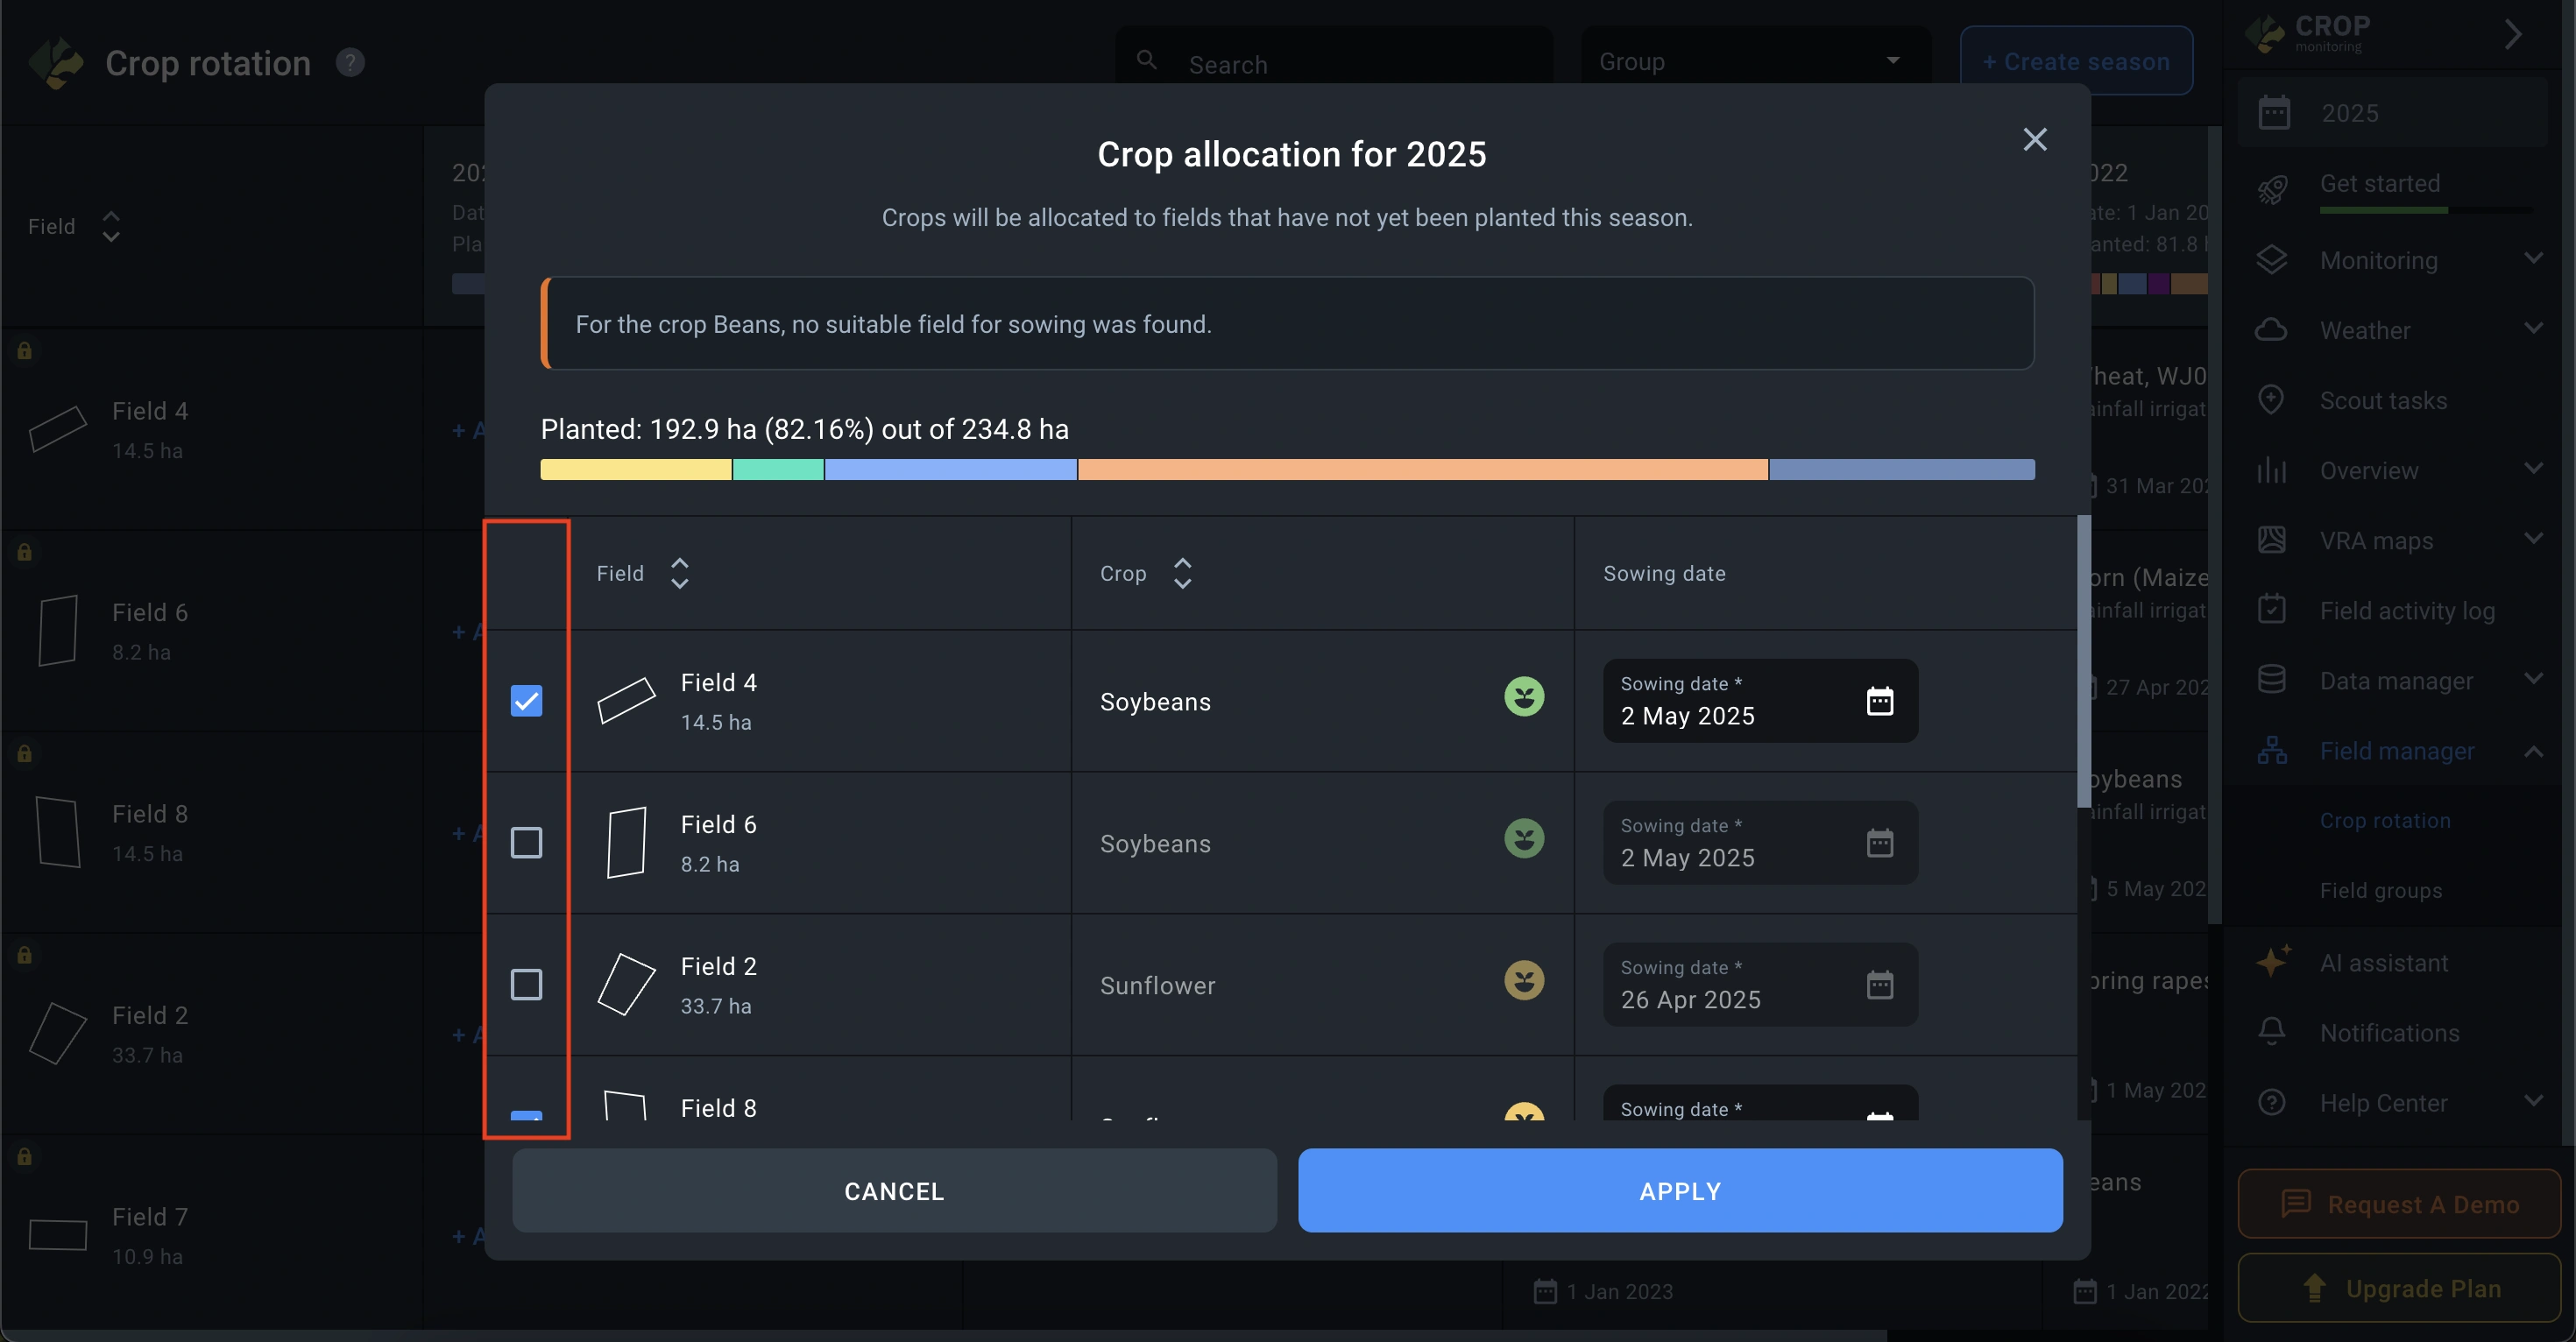
To save your allocation, click Apply – crops will be assigned to fields based on the allocation logic.
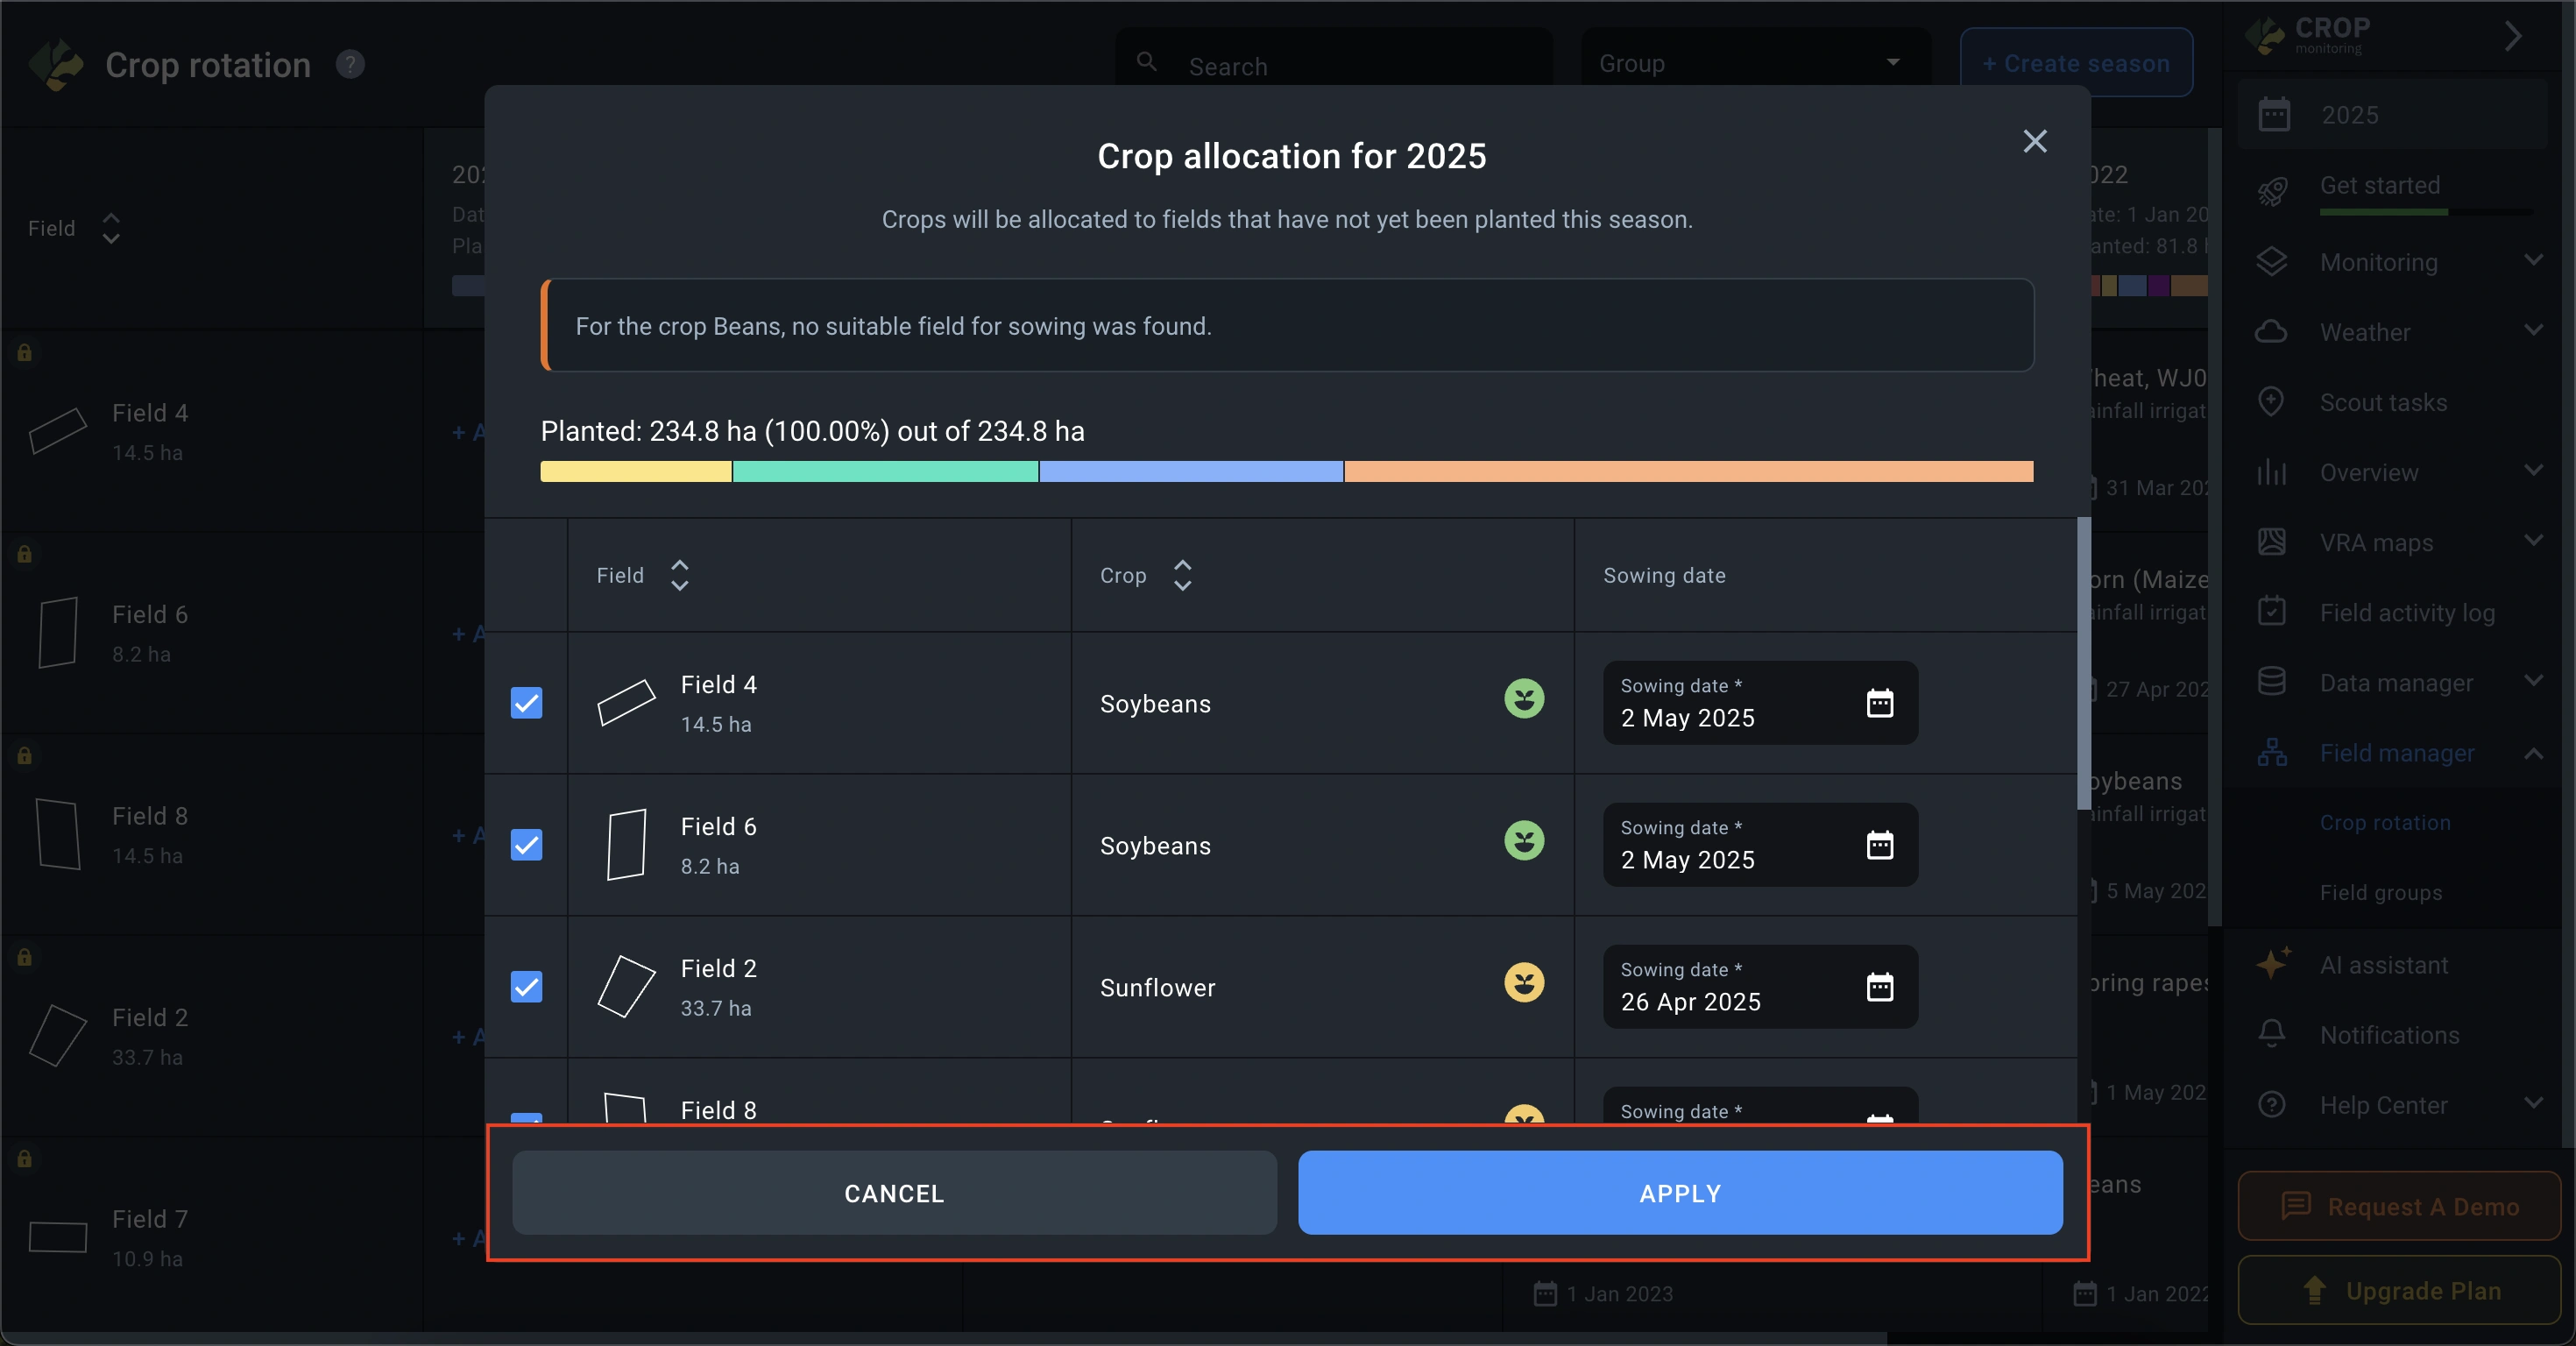
To discard the changes, click Cancel.
Field Groups
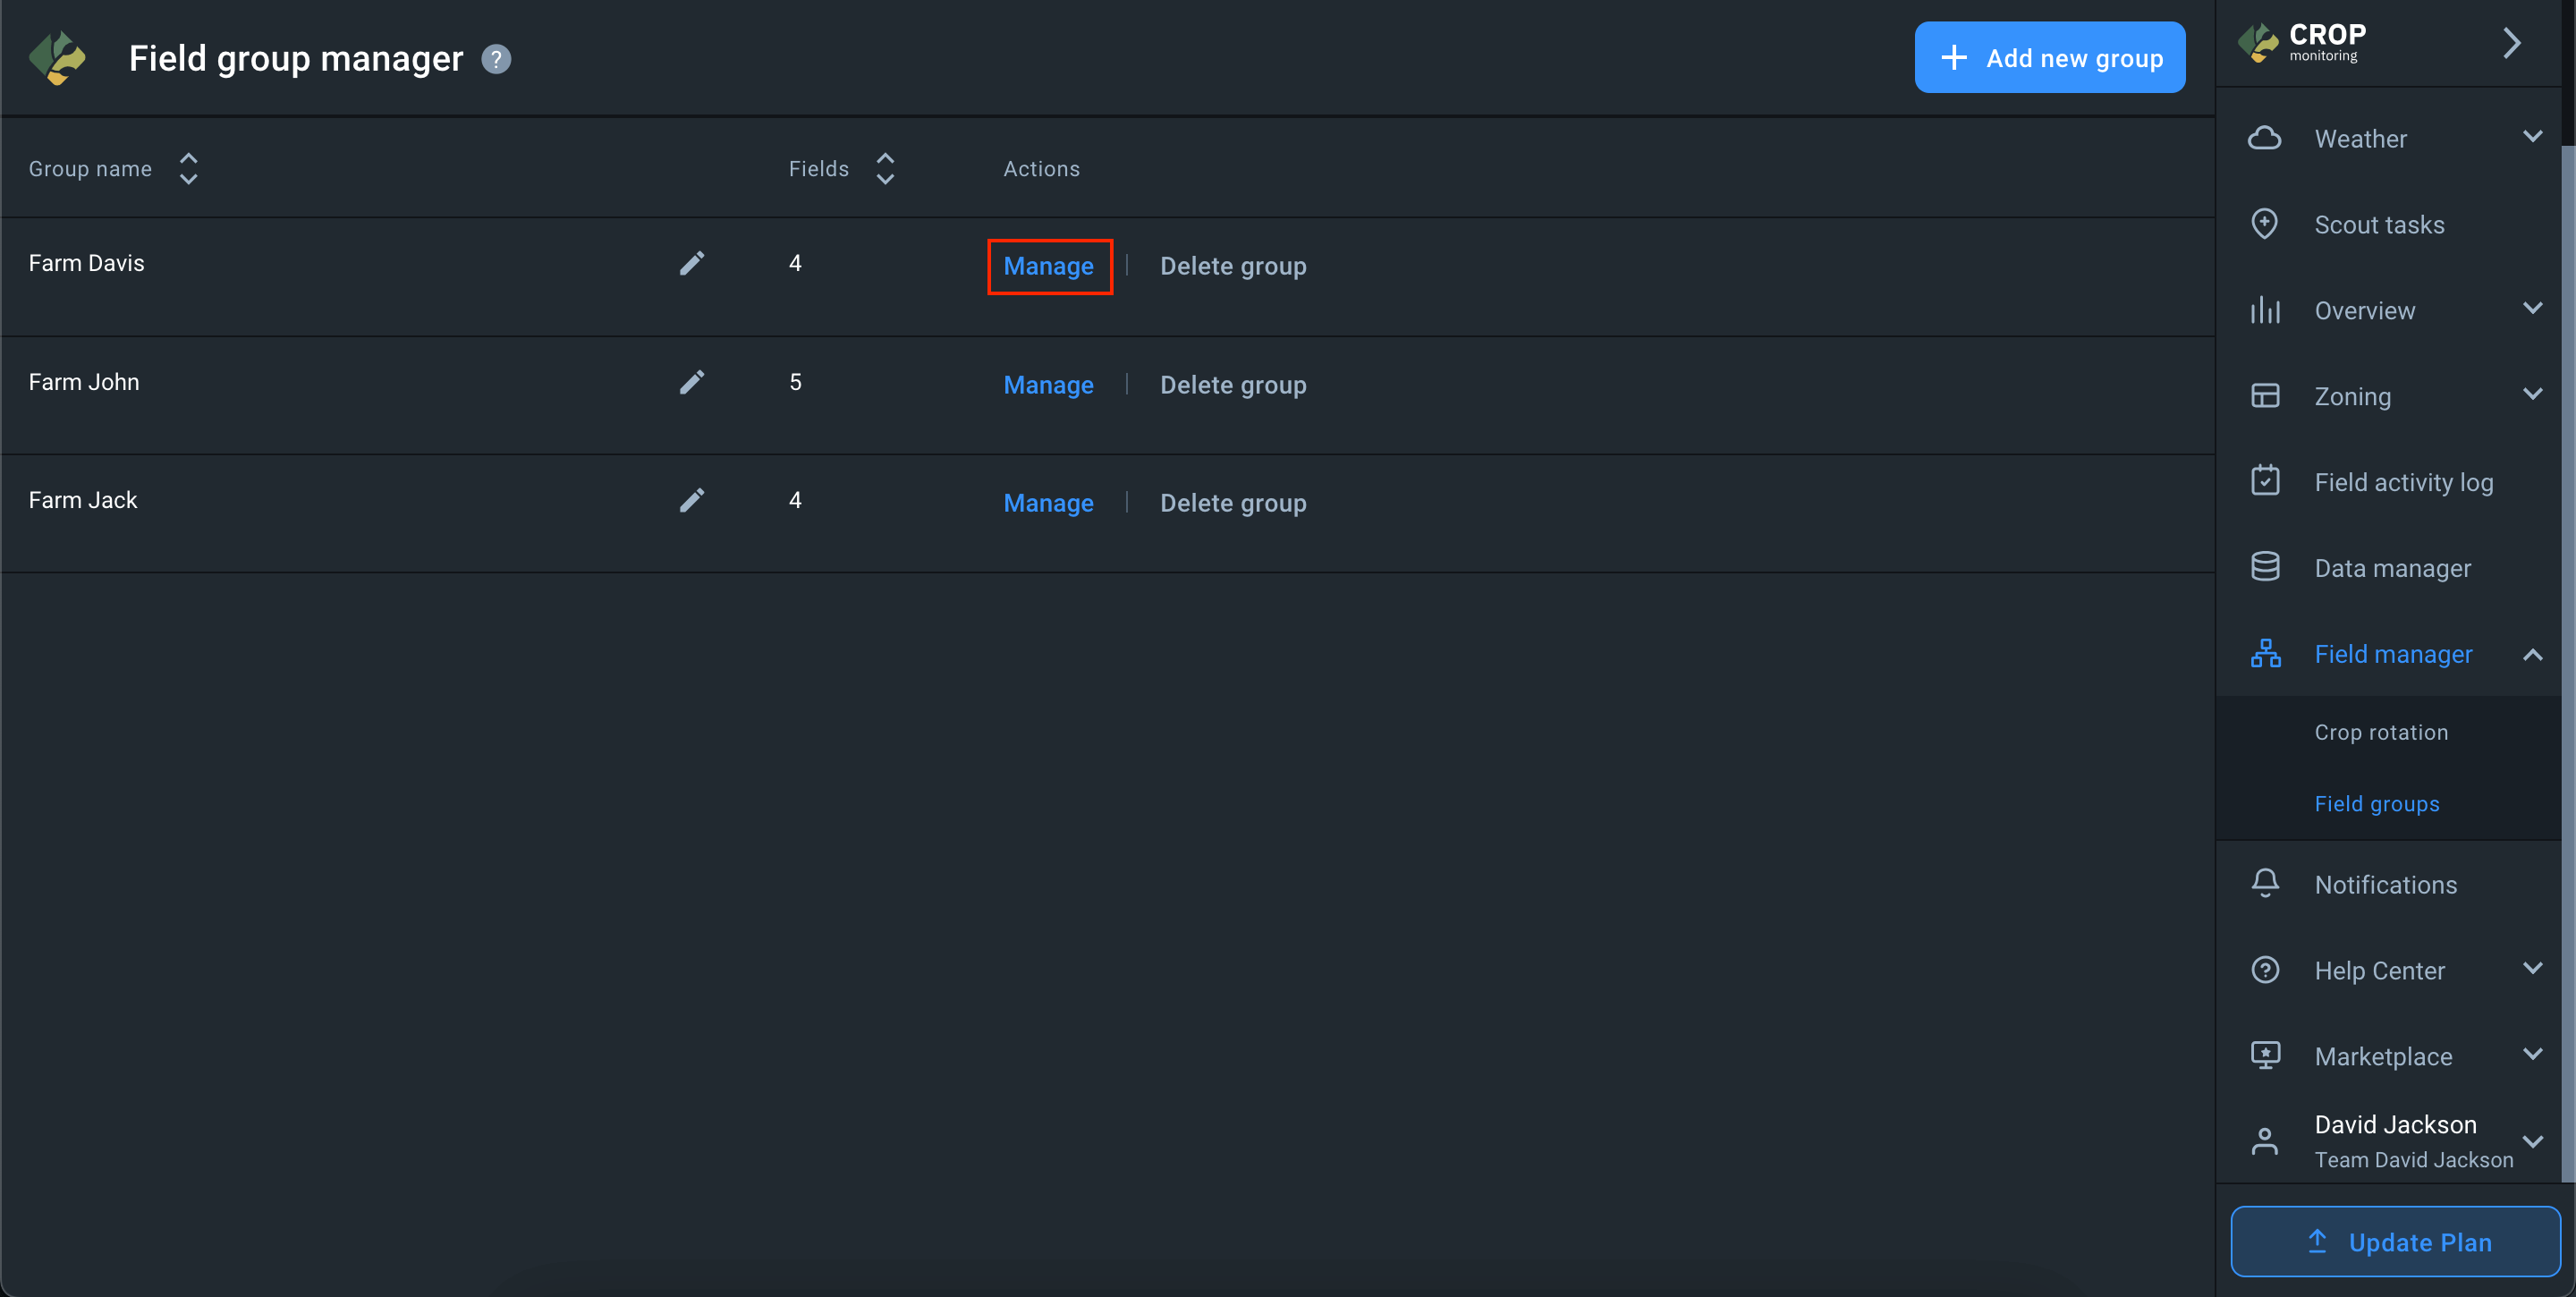
Field group manager is needed to group fields by common characteristics and improve field management.
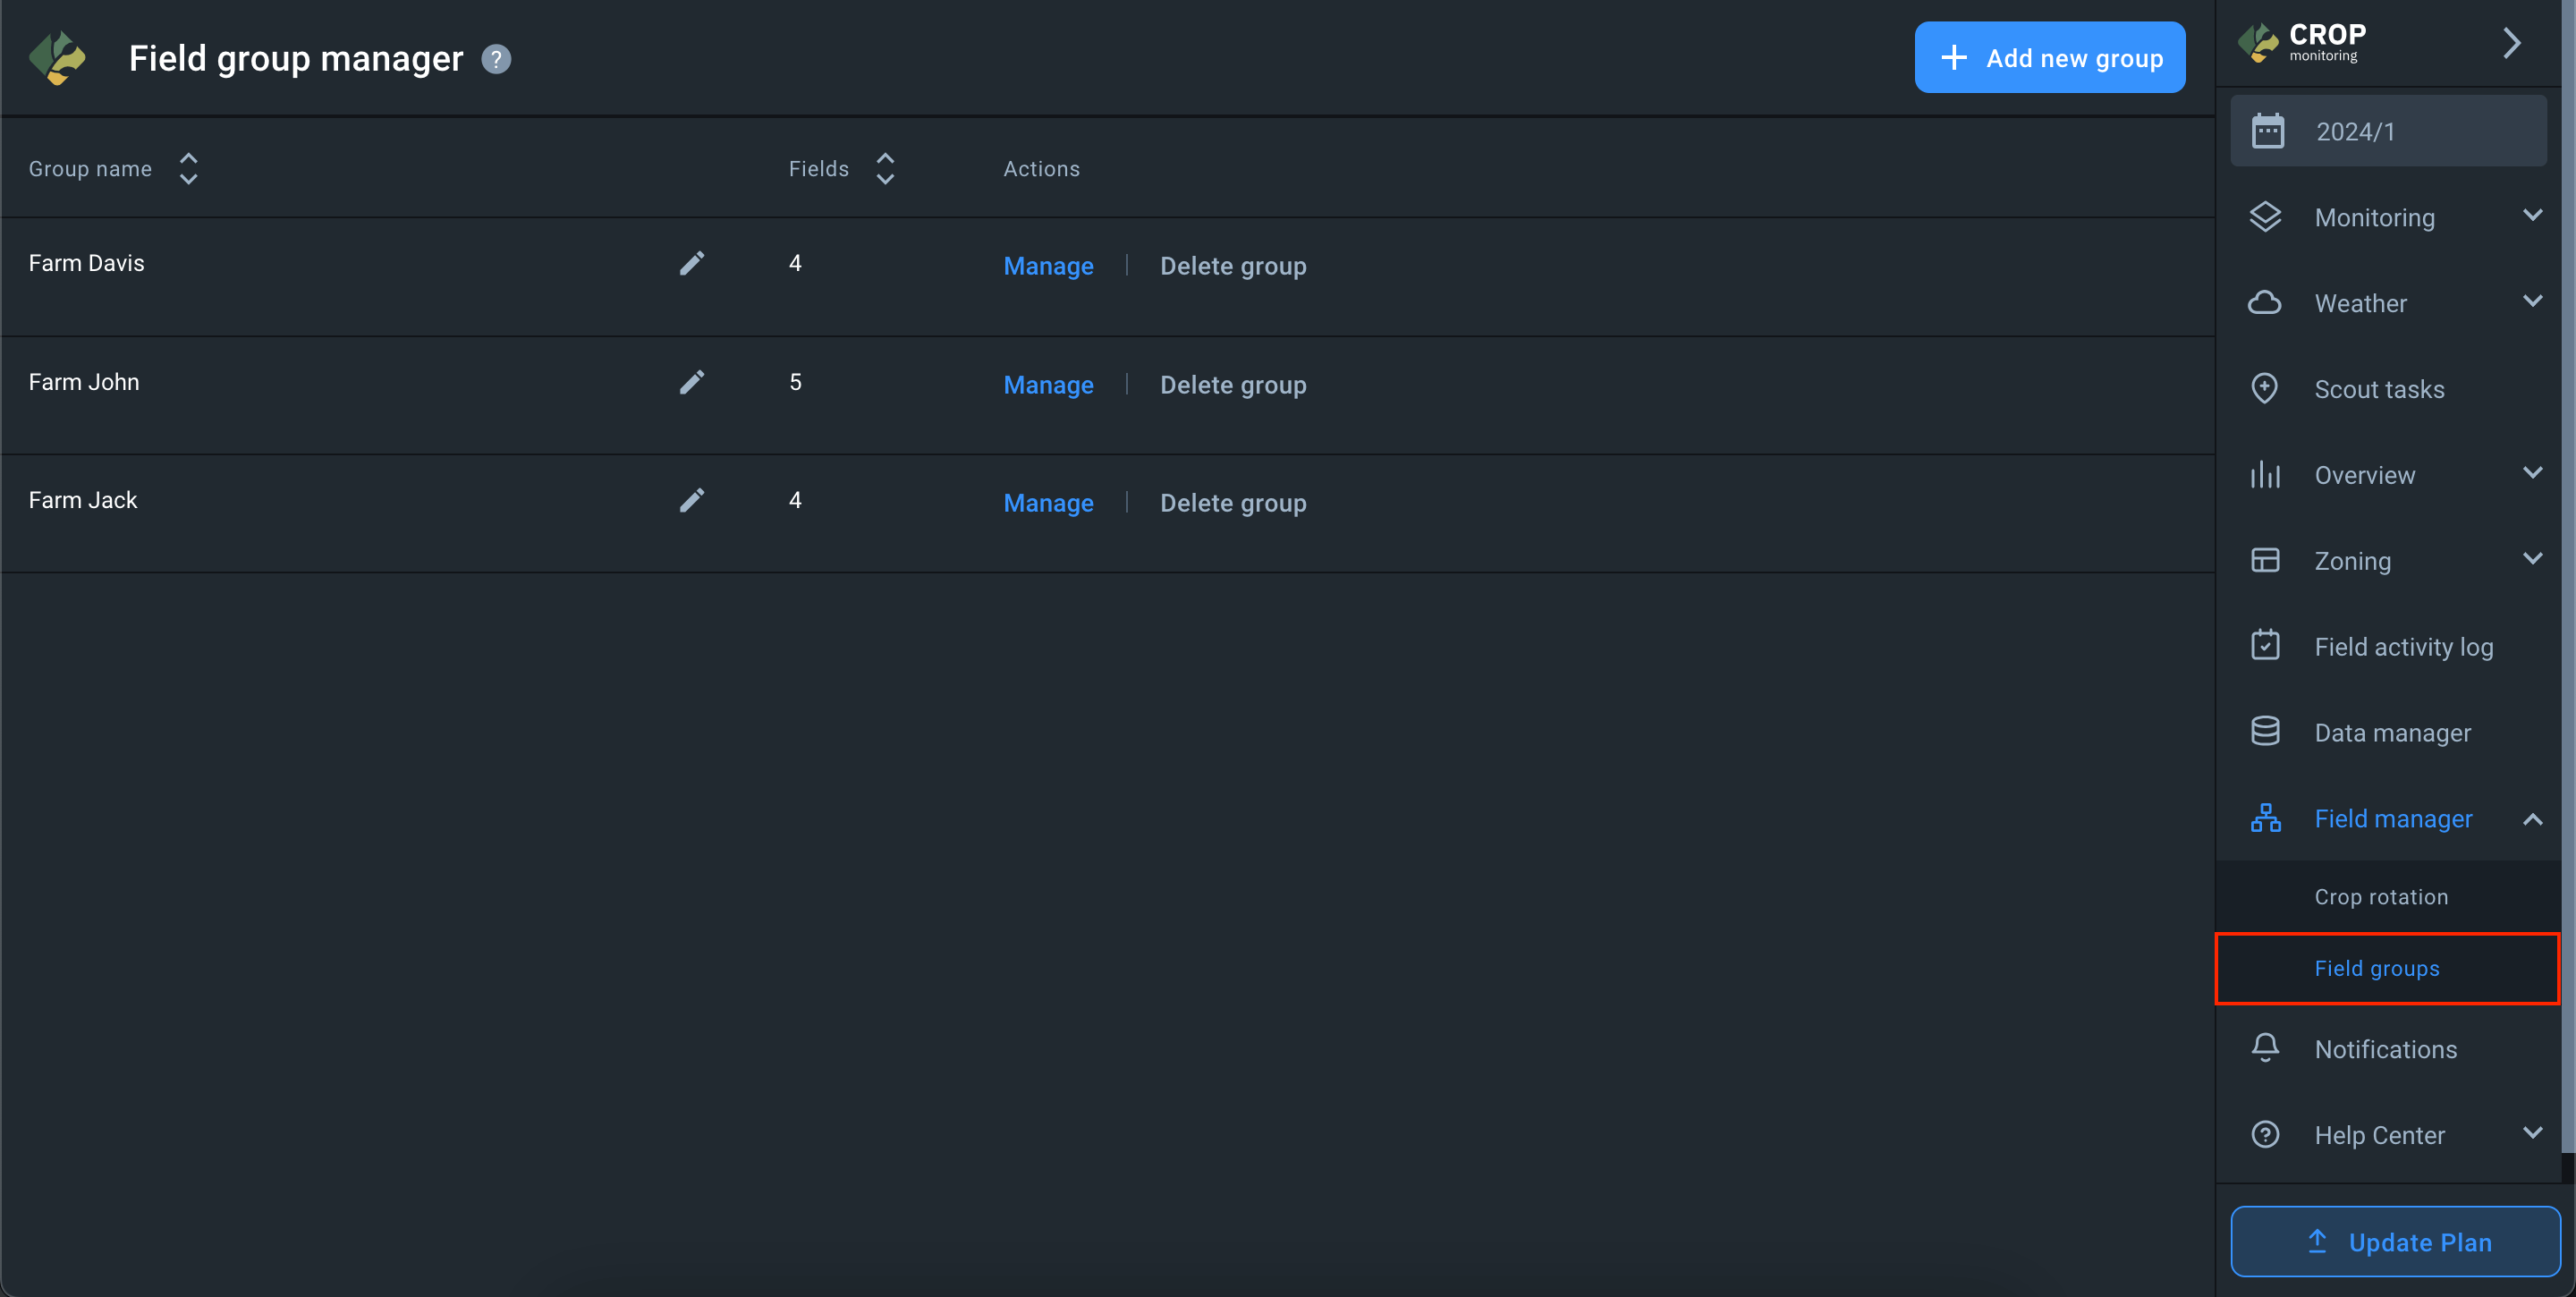
The Field group manager screen displays the list of groups in your account and the number of fields in each group.
Add group
To add a new group, click on the + Add new group button.

In the window that opens, enter the name of the group and add required fields to it.
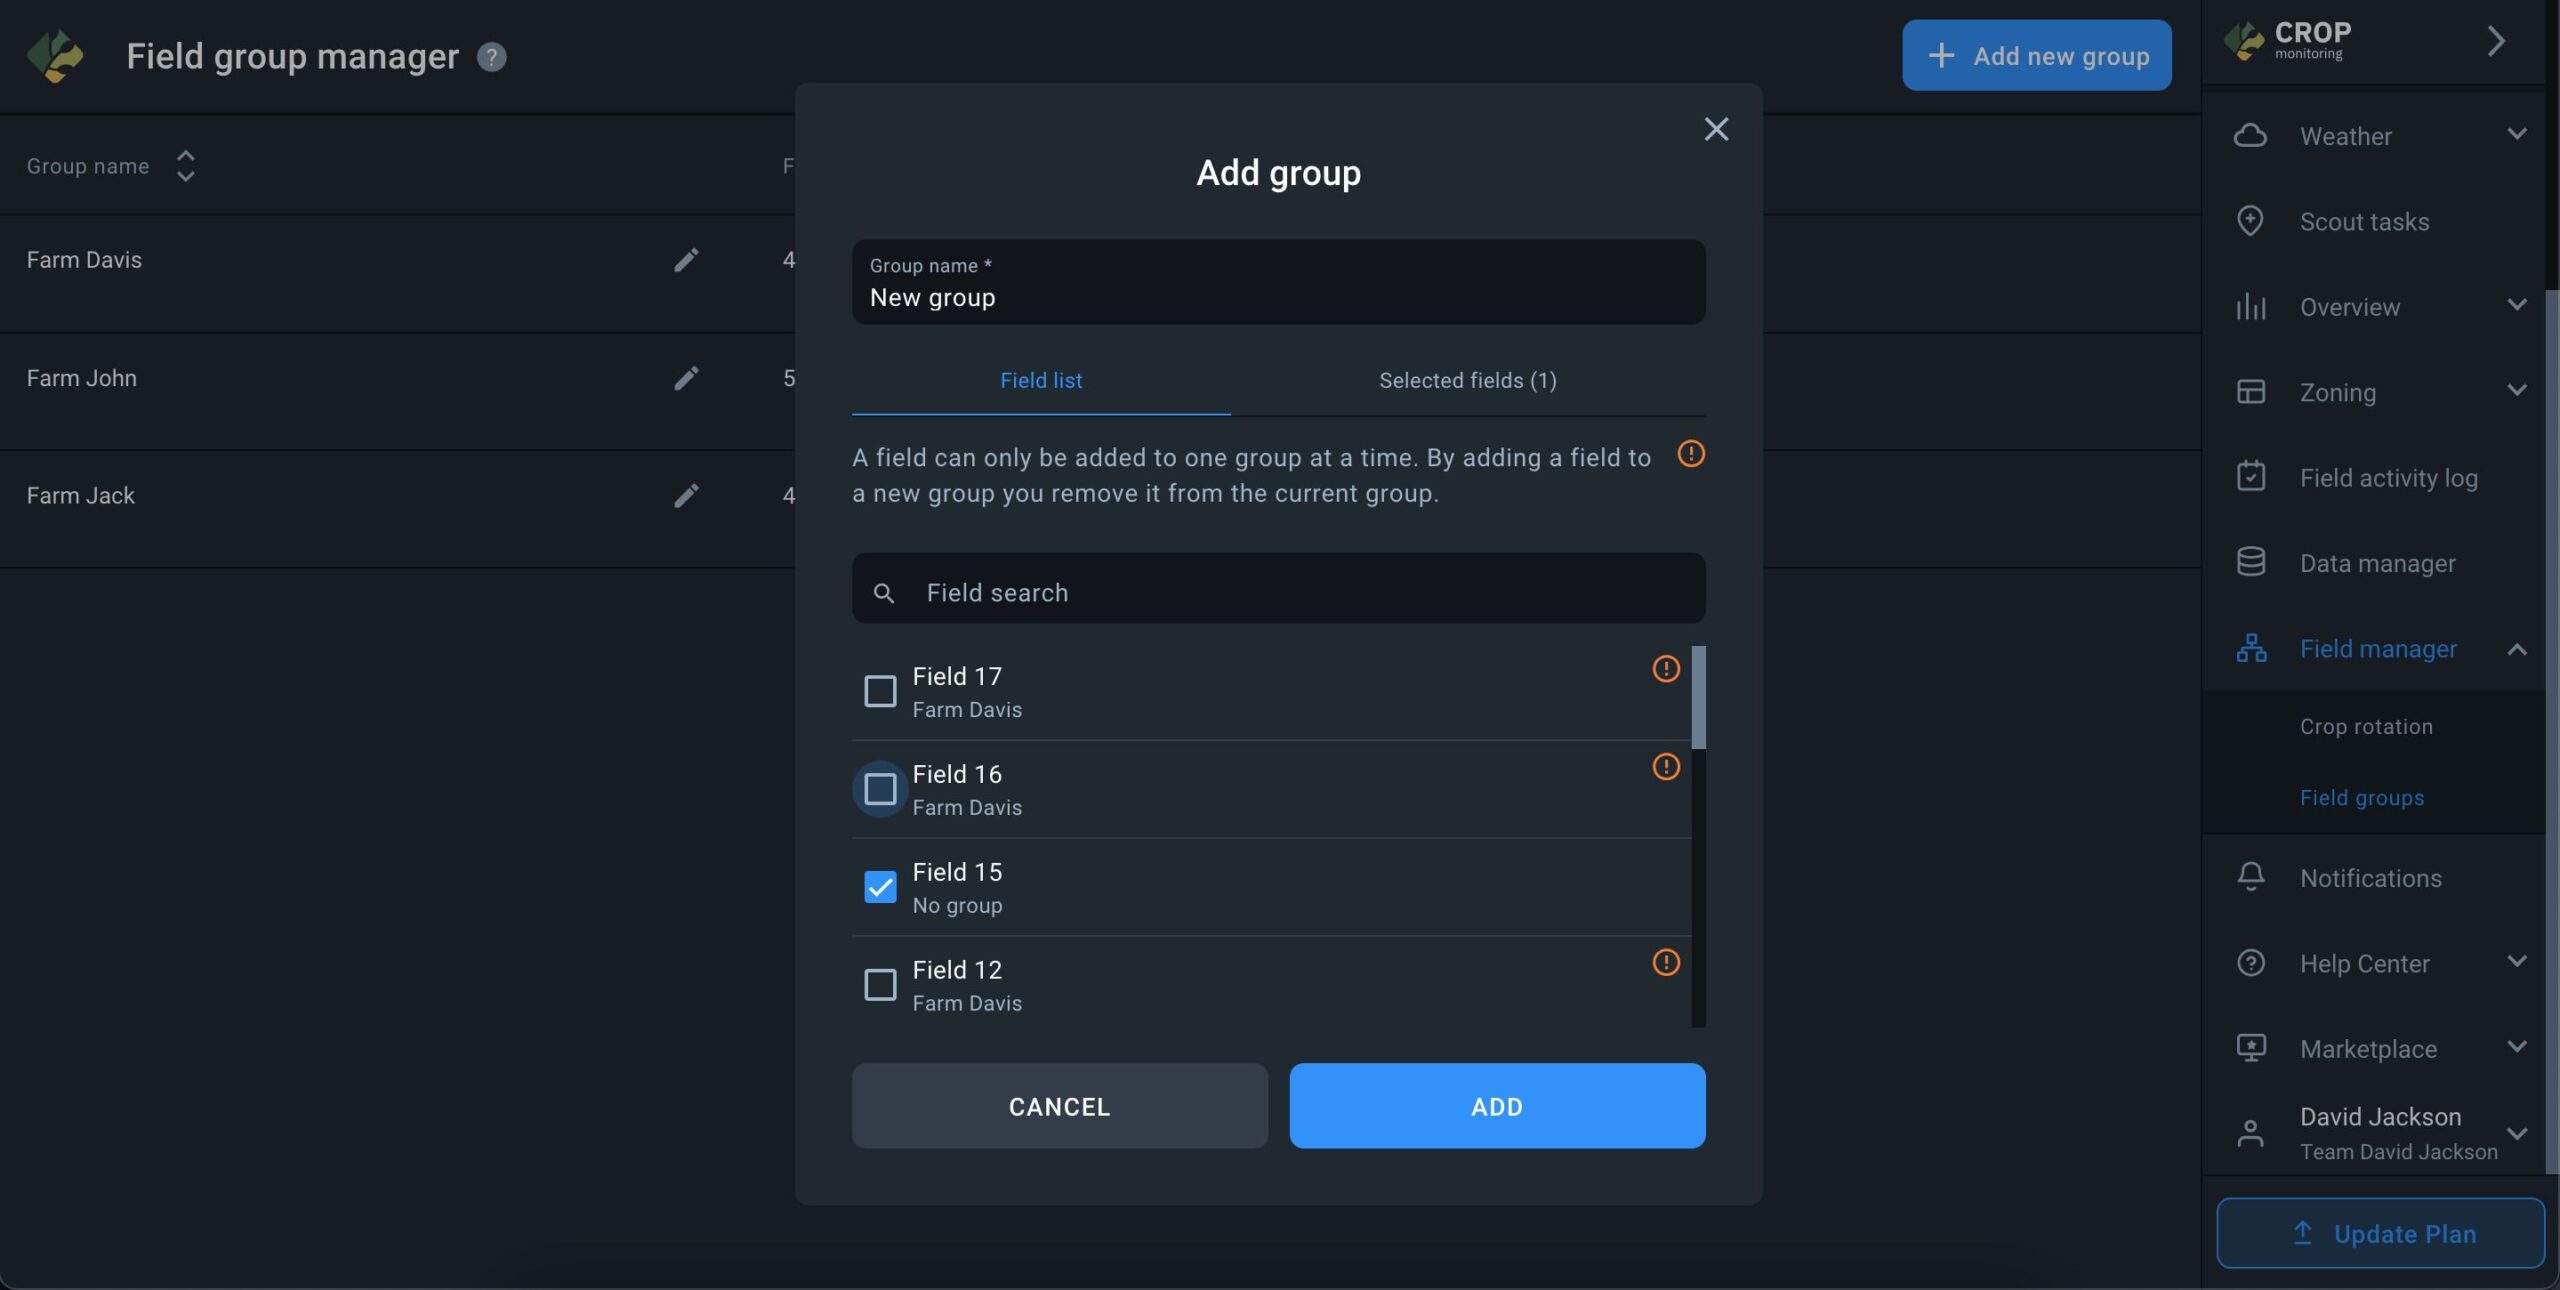
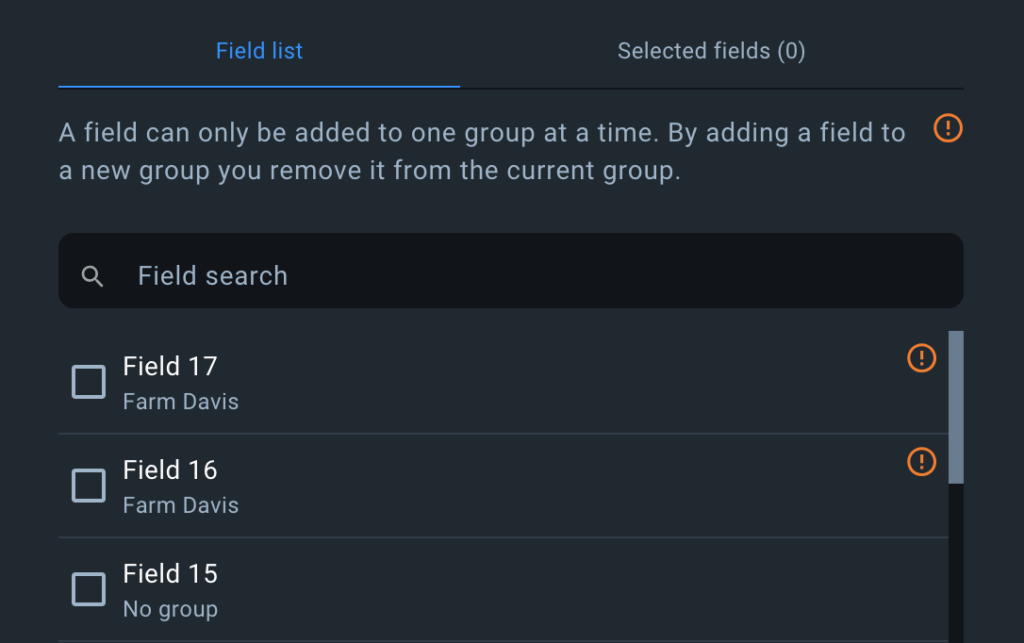
One field can only belong to one group at a time. Selecting a field that already belongs to a group for adding it to a new group will transfer it from one to the other.
Fields that already belong to a group have a specific marker next to them in the list.
Manage group
To edit a group, click on the Manage button next to the group you want to edit.
When you open a group, a list of fields that belong to it is displayed on the screen. You can add fields to the group on this screen by clicking the + Add fields button.
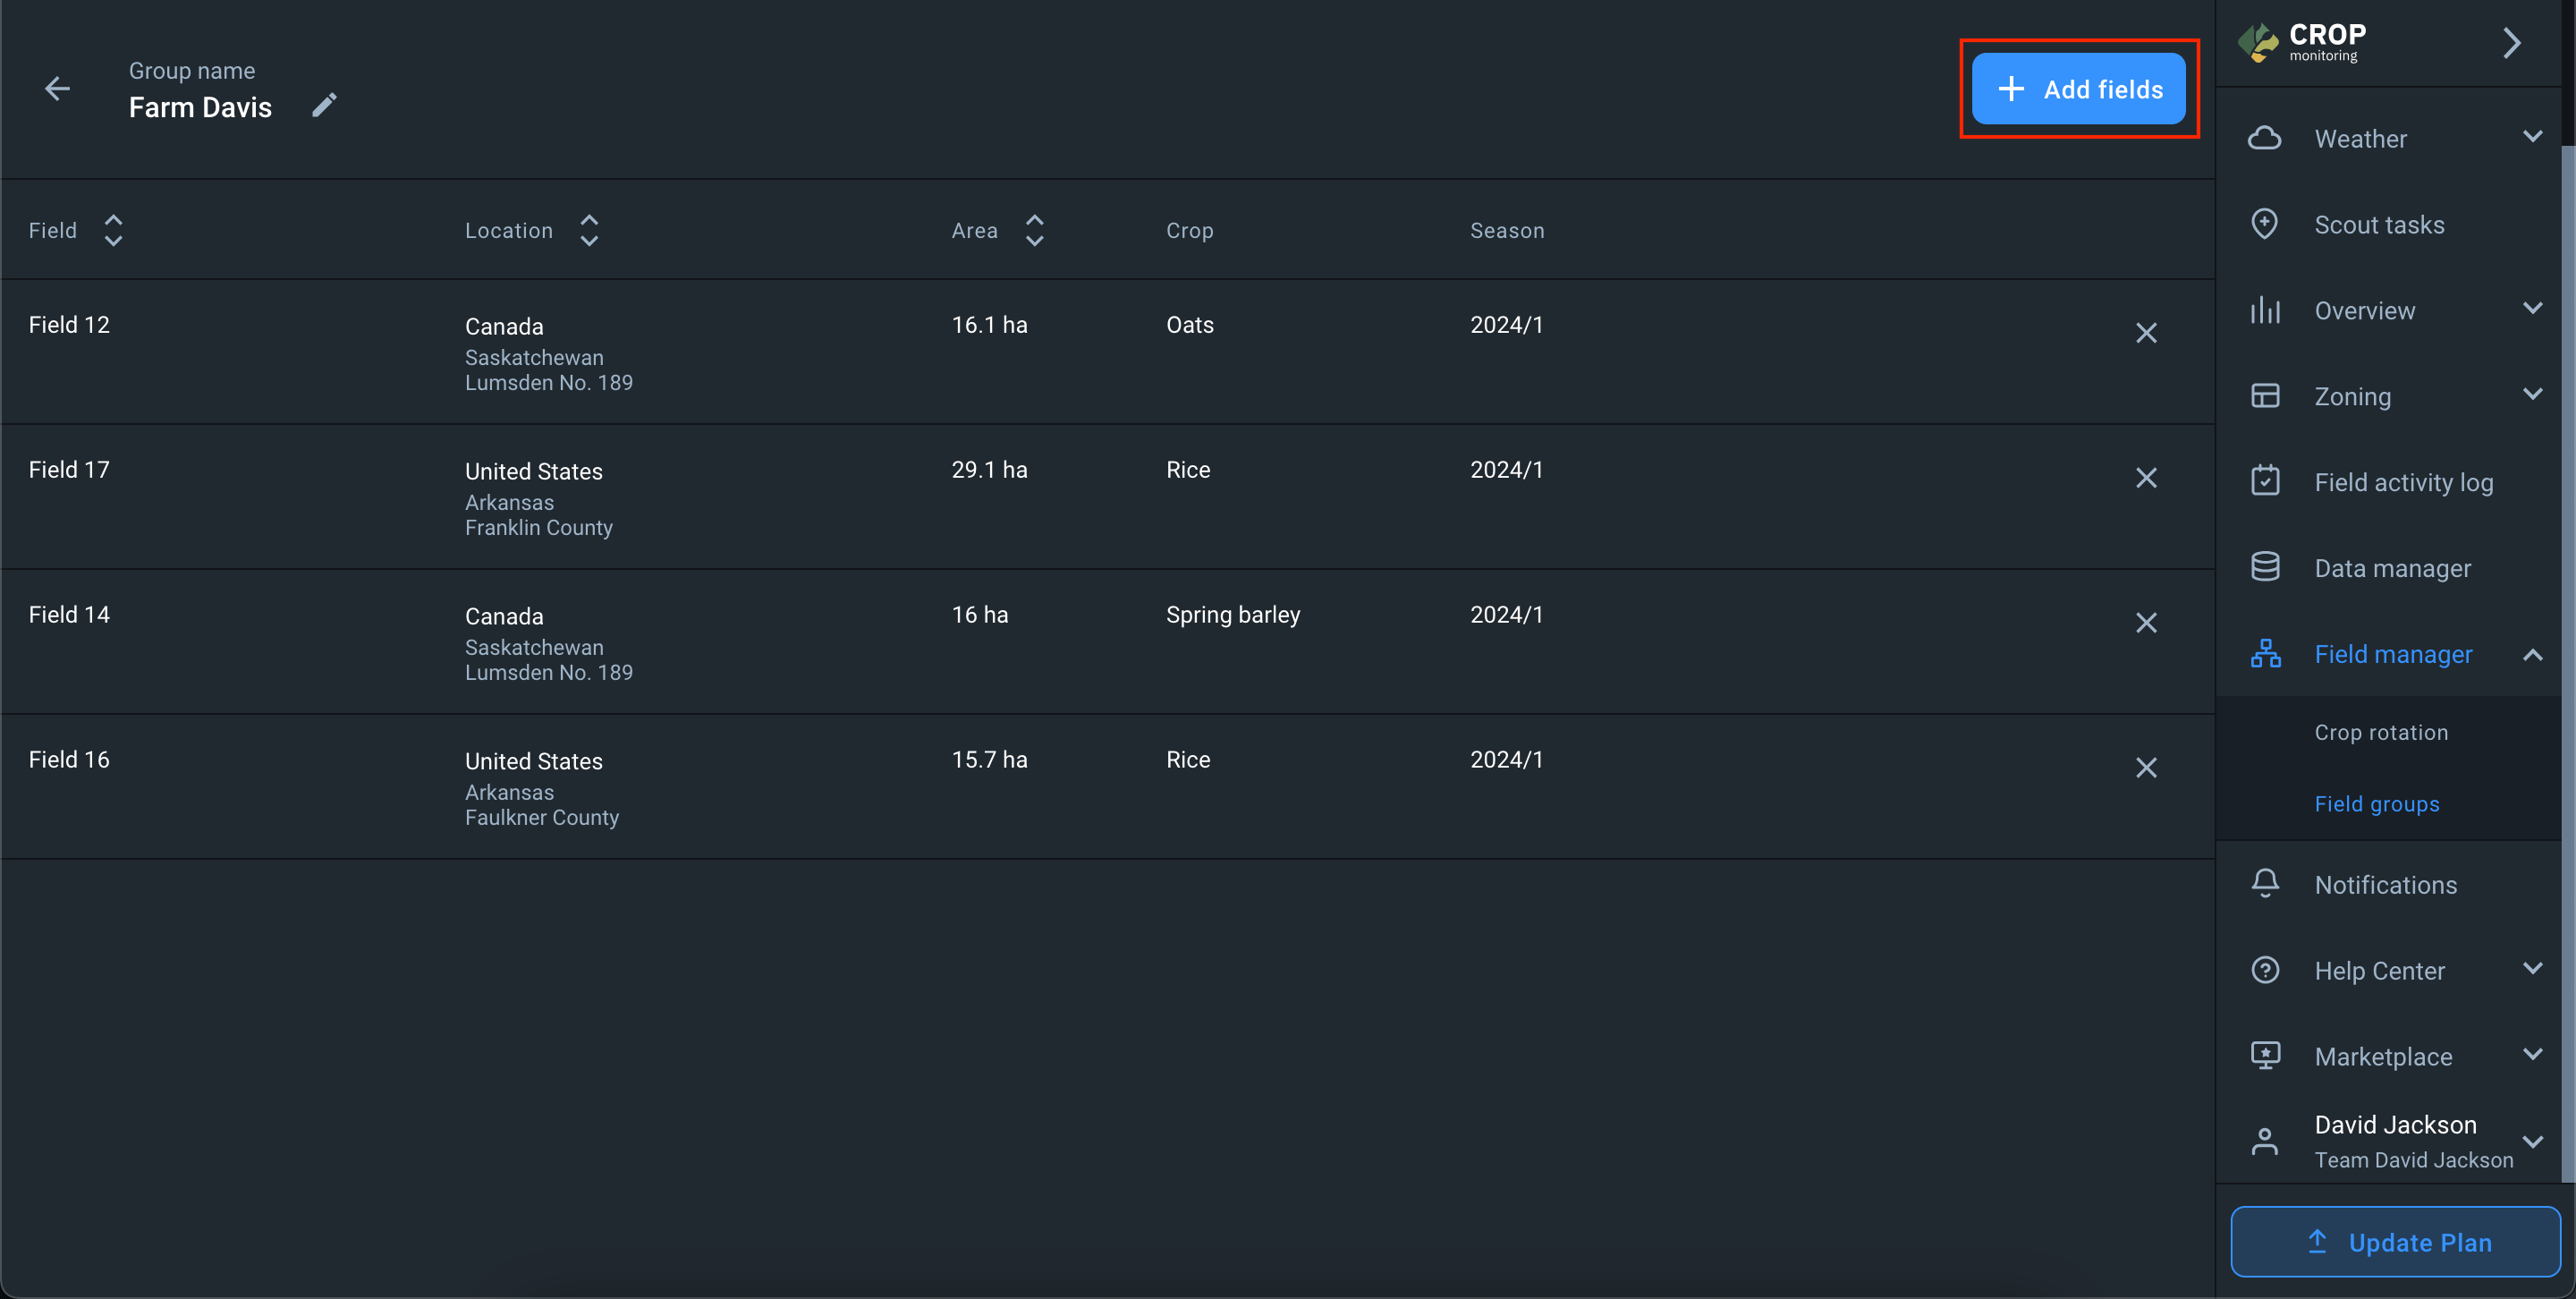
You can also remove a field from the group by clicking on the X button next to the desired field.
- The field is removed from the group and remains in the account without the group.

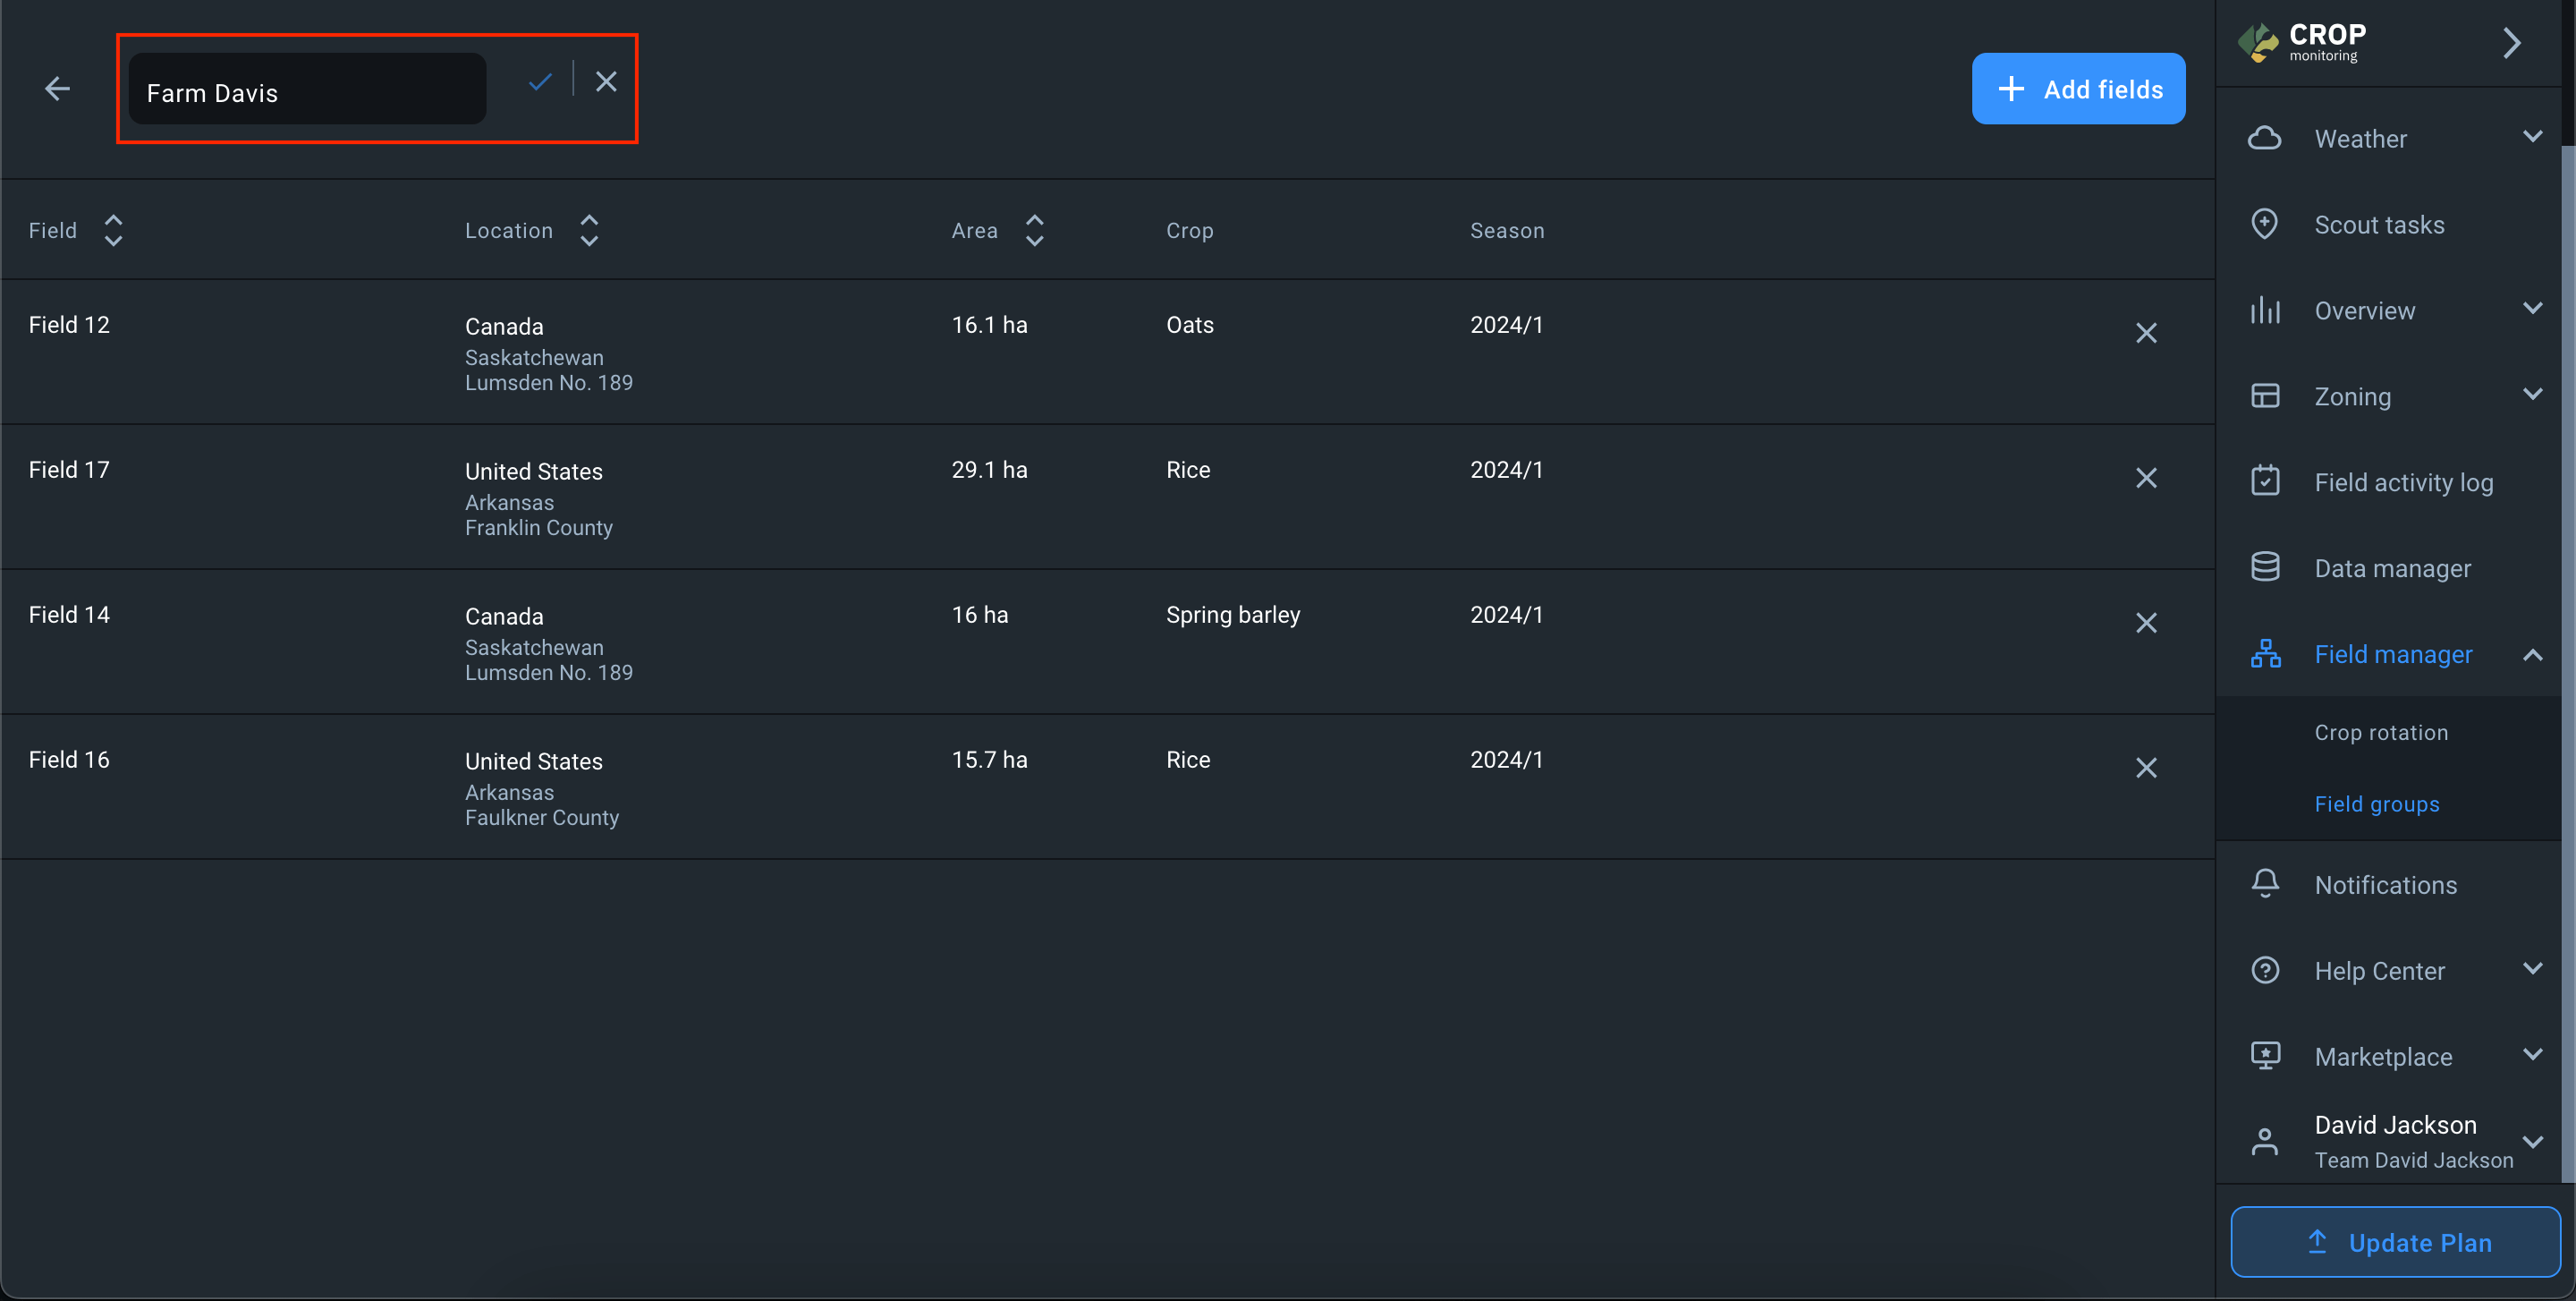
You can also change the name of the group on this screen.
There is also an option to delete the group. When you delete a group, the fields that were in that group remain in the account without any group.
